Other than the big hatch, im pretty much done with the turret. made some grab handles for the back and need to make a couple more. think i may redo one, it doesnt look right to me. anywhoo, after some more filler in spots ill start the hull details.
Still looking good, Gary. I've been playing around with Vallejo acrylic putty for smaller welds, like on tow brackets and such. Not much "texture", but it's really quick, and the applicator makes it possible to squeeze out a nice thin line of putty. I still use styrene rod for long beads, but I find myself using this Vallejo stuff more and more.
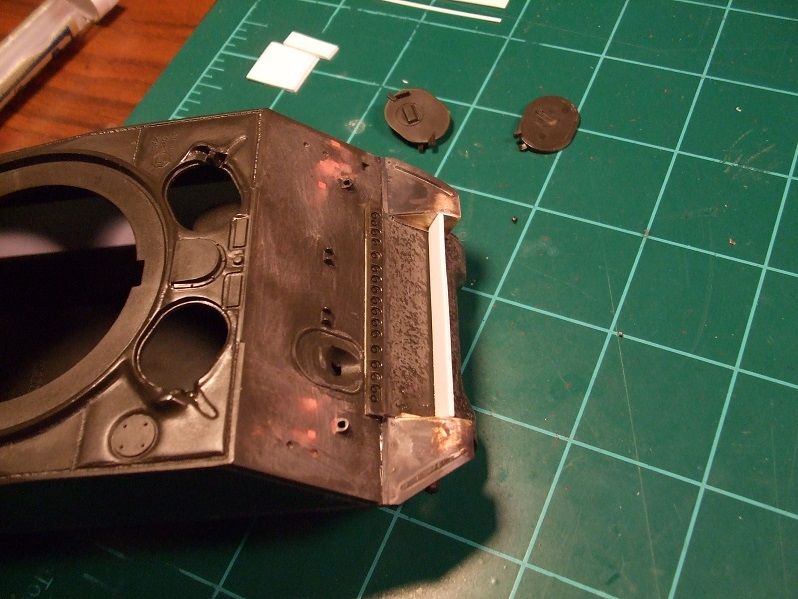
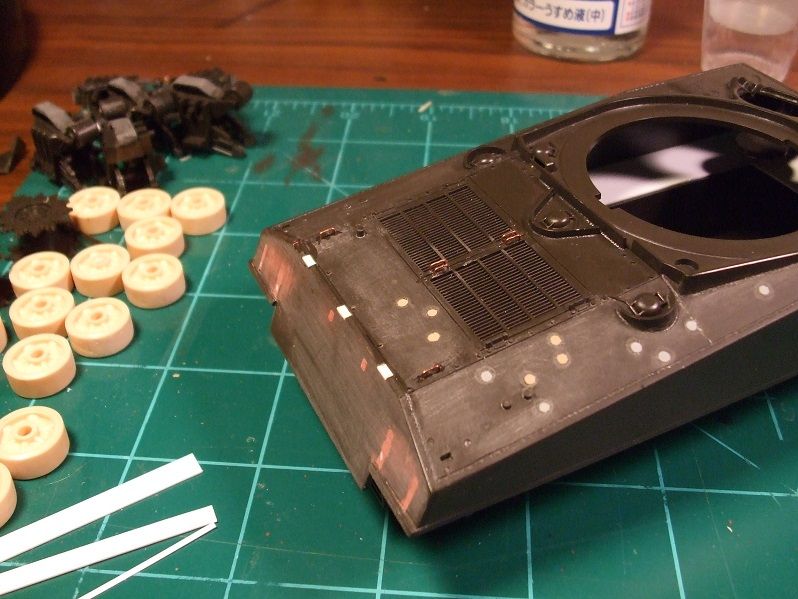
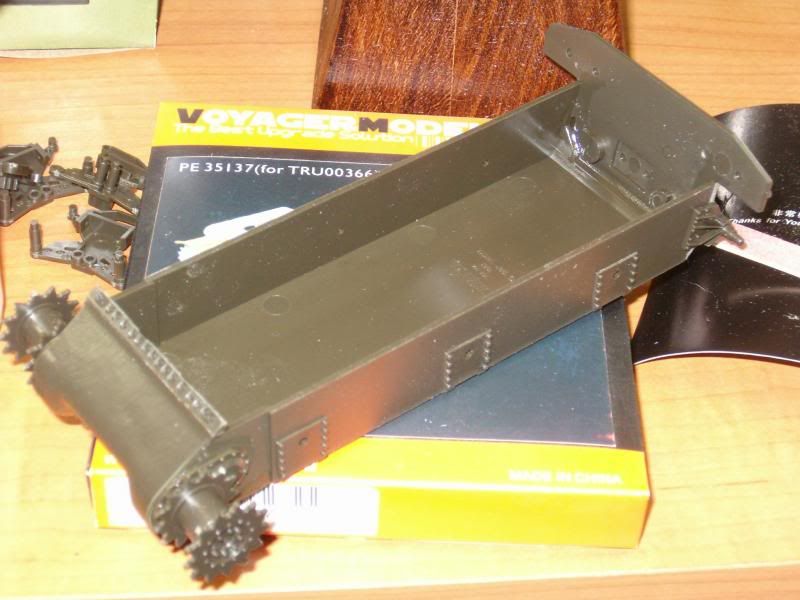
Shermans are good for the soul. My inner being got happy last night, and I used up a lot of Squadron Green putty and Evergreen rod. I got my turret contours where I lkie them, and added a pretty good shell ejection port from an old Academy M51 turret, but I still need to do the "undercut" as a taper and not a 90-degree cutout as I still have it. I wanted this line equidistant from the base all the way around the circumference of the turret, and this way was easiest. Pic: I have the running gear on, still like the Tasca stuff. All the adapters to fit the bogies to the Tamiya hull are in the box, clearly called out in the instructions as to side and orientation. Cool stuff. Tool locating holes are plugged, trans cover textured, and weld troughs filled with rod and half-round, but that's where I ran out of gas last night. Pics: I copied the bottom of the old Dragon hull, looks like the -A3 hull, I think..... Drain holes/plugs/surrounds are made from a thin slice of tube and a slice of hex rod. Onward through the fog!
T'anks, John. Sing out with anything I can still correct if you see it, please. I'm trying to keep the floaters out of the pool, but I can live with the little things, sometimes. I was looking for my Hunnicutt Sherman book, and Zaloga's three books on the NW Europe campaings and Shermans, and I packed 'em away and can't find them. Argh! I'm gonna need them pretty soon, like now.
T'anks, John. Sing out with anything I can still correct if you see it, please. I'm trying to keep the floaters out of the pool, but I can live with the little things, sometimes. I was looking for my Hunnicutt Sherman book, and Zaloga's three books on the NW Europe campaings and Shermans, and I packed 'em away and can't find them. Argh! I'm gonna need them pretty soon, like now.
What dragon kit did that turret come from? I have a Dragon parts kit and might do the same someday.
The old Imperial series M4A3E8, #9010. It's got the original Dragon take on the Easy Eight suspension, one whole sprue for the upper hull that's a direct duplicate of the Italeri sprue, and indie T66 tracks. The turret looks like Italeri's parts as well, but there are small differences. It also has the applique armor for Thunderbolt VII. I got the whole kit for $5 at a show just for the turret. I should have passed. Need some parts?
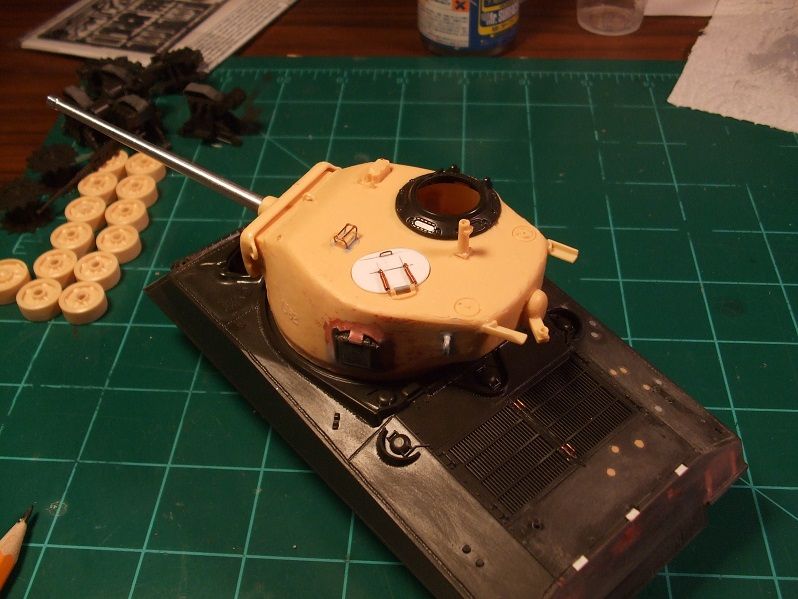
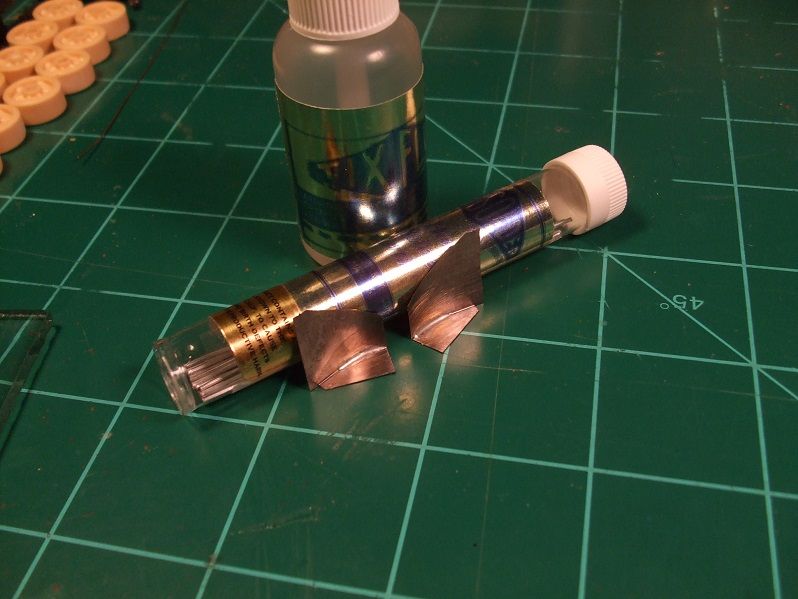
Looks familiar.... Where did you pick up the solder and flux, looks like it works really well. I've been putting off using brass a lot because I hate it's fragility, but soldering would fix that for sure. So..... that Beatles 50th anniversary of being on the Ed Sullivan show, big deal, wife's a Beatles nut, guess who watched with her, from the modeling room? Yep, yours truly. I got the hull welds textured, still may sand the beads on the sides of the hull, front and back since they stand proud a little more than I like, but the rest I'm happy with. Welds on the turret and rear deck splash shields were done with the Vallejo putty. It's applicator is fine enough that I can actually "push" the putty just like the rod if I was actually welding. Neat. I hope the "stacked dimes" show up under primer. I also got the turret shape finalized and applied a couple layers of Mr.Surfacer 500, then masked the area around the side port and put a couple more layers there, removed the masking tape and sanded to give a smoother finish than the rest of the turret. I've seen this on a couple of T23 turrets, and Tamiya replicates it on their M51 turret as well. I like the effect. I still need to do a cut line on the bustle area, but ran out of time last night. I also cut the "soft" commander's cupola out and prepped the hole for something a little more detailed. Honestly, I like the shape of this turret now, but it would be whole lot easier to rob one from one of Dragon's later kits. Pics so far: On a side note, I found my Sherman books, and was telling my wife about the significance of the Hunnicutt book (which she bought for me as a Christmas present a few years ago!) and described it as the Sherman Bible. I then amended that and called it the King James version, told her about the New American Standard version, Son of Sherman, and she said: Why don't you go get one?" It's all in the approach.
Jeff, I've used PE and thinned plastic kit fenders, and to tell the truth, once it's all said and done I find it hard to tell the difference. For a PE klutz like me that's good news.
Okay... got a start here (not much of one) but I am assembling my stuff right here:
Started at the beginning, suspension cut out and prepped along with the road wheels and sprockets too. Letting the front nose and rear hull dry before I proceed:
What do you guys use to primer the vinyl tracks with?
I need to work on them and set aside.
Jeff
If you're using the kit tracks, I use Krylon automotive gray primer in the rattle can.
Okay, so I got to looking in the Sherman book, and quickly realized I'd copied the bottom of an M4A1 hull. Oops, but I'm not surprised. So out came the razor blade (not for my wrists) and off came most of what I'd put on. A little bit of scrap styrene and some sliced hex-rod and I'm better now. I left a few things that probably shouldn't be there, but they look kinda cool... Funny thing, I'm plugging along on an OLD shelf queen at the same time, built off the Academy M51 hull, kinda looks the same..... Then I saw the spare track racks in one of the old Dragon kits I'm digging into for bits and realized (there's that word again) Academy's brackets didn't look so good. Off with 'em! I've also add the skirt hangers from plastic strip, engine cover rests from the same, and started putting lights on. And since I had the old girl out, I took a pic with the current project. These are both off the Tamiya hull, so I guess I'll do two at once. Seems easier that way..... I'll get the old one on the regular board as soon as I have something more to show on it, but it's destined to be an M4A3E8(105), off a pic of a bunch of shermies parked by a dike somewhere in Germany, last few days of the war. Hmmm........ Shelf Queen GB?
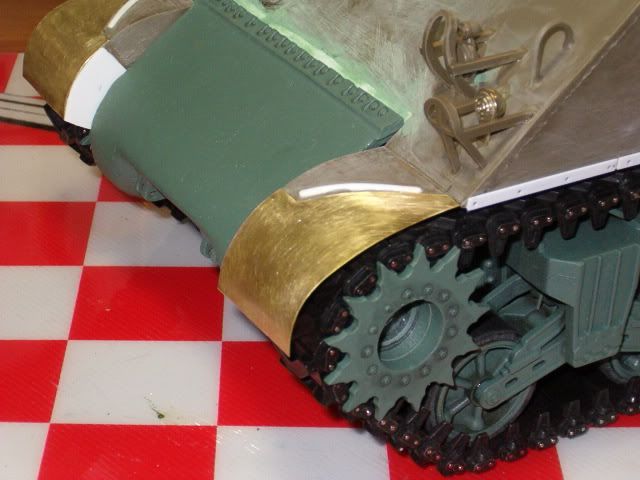
I got a little time in Friday night, but the rest of the weekend was spent outdoors. It was just too nice to spend in the cave..... So I fixed the rear fender mounts, added lights and guards, a siren, test fitted the mantlet. That was about it actually. Having the Son of Sherman book close at hand is both a blessing and a curse: The info I need is there, but I'm slowing down because I'm checking for accuracy all the time and deciding I need to re-do something, or not to use some part I was planning on, which means digging out something else. Oh well. On the up-side, I DO have a list of tanks to build using parts and kits already in the stash, which is a good thing. I really need to thin the stash and parts inventory, and I'm realizing I've been saving a bunch of parts that I'll never use. Pics: Edit: First pic doesn't show it well, but the two, incorrect center holes in the fender mounts are filled, and one drilled between them. The Squadron green putty is darker than the new hole I guess. I have also noticed a slight gap at the top of the trans cover and glacis that needs a touch of filler.
What barrel are you using? The reason I ask is the thread protector looks weird. If you want, I probably have a 2-part Tasca 76 tube laying around with correct thread protector if you want one.