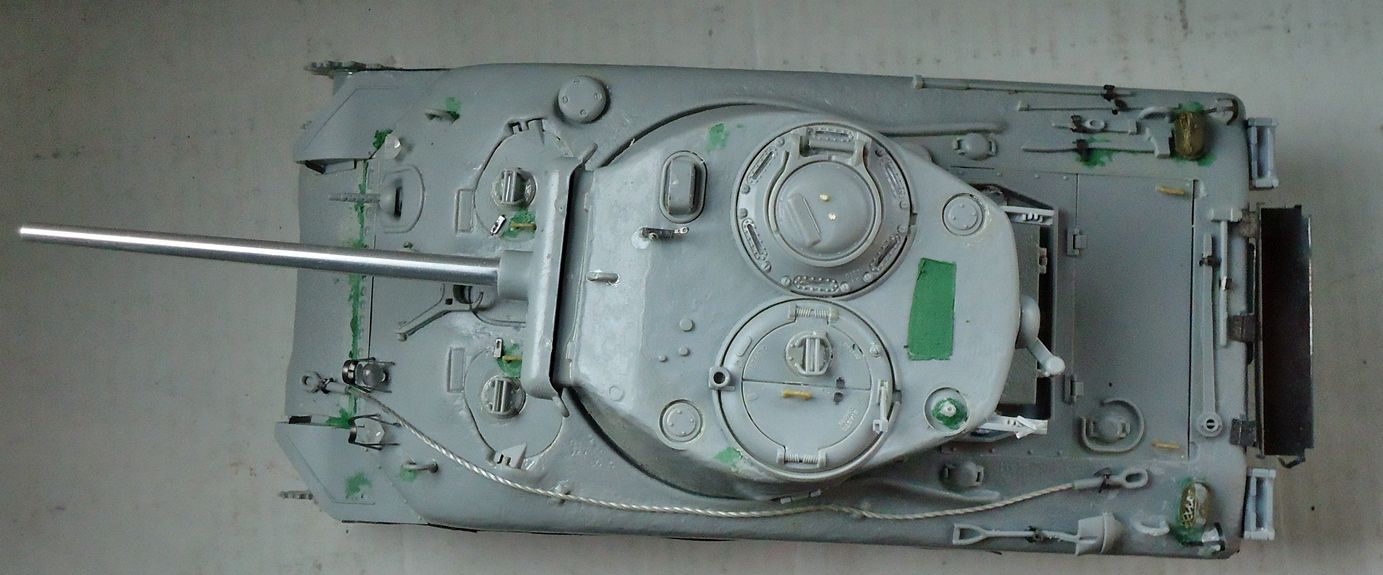
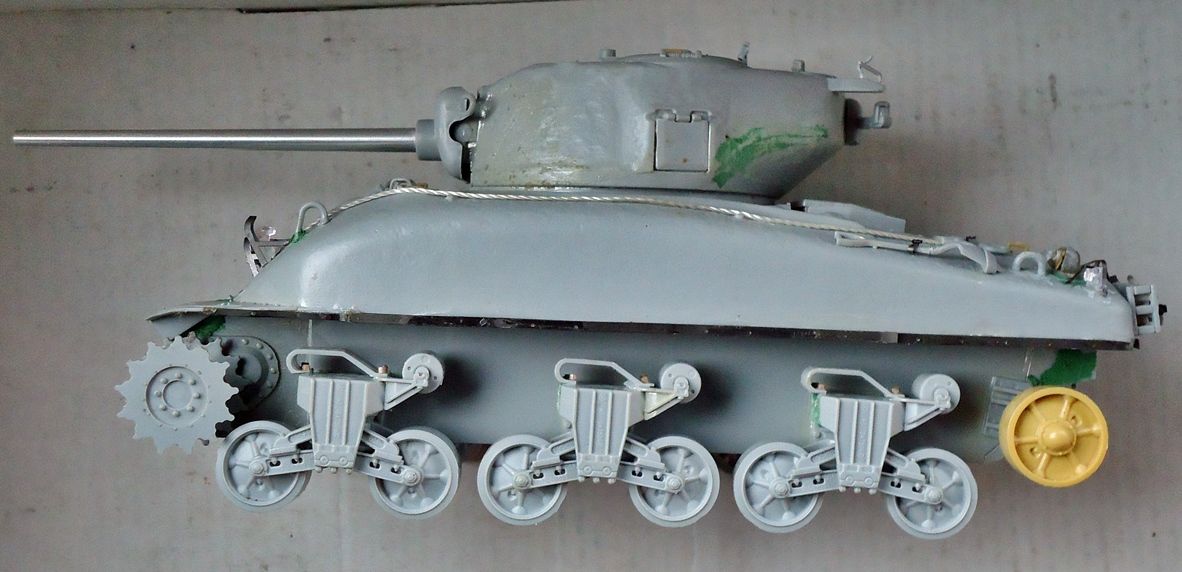
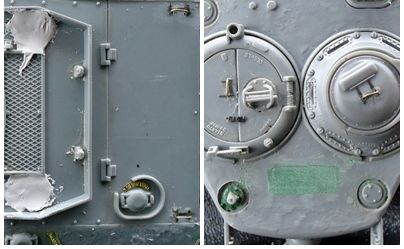
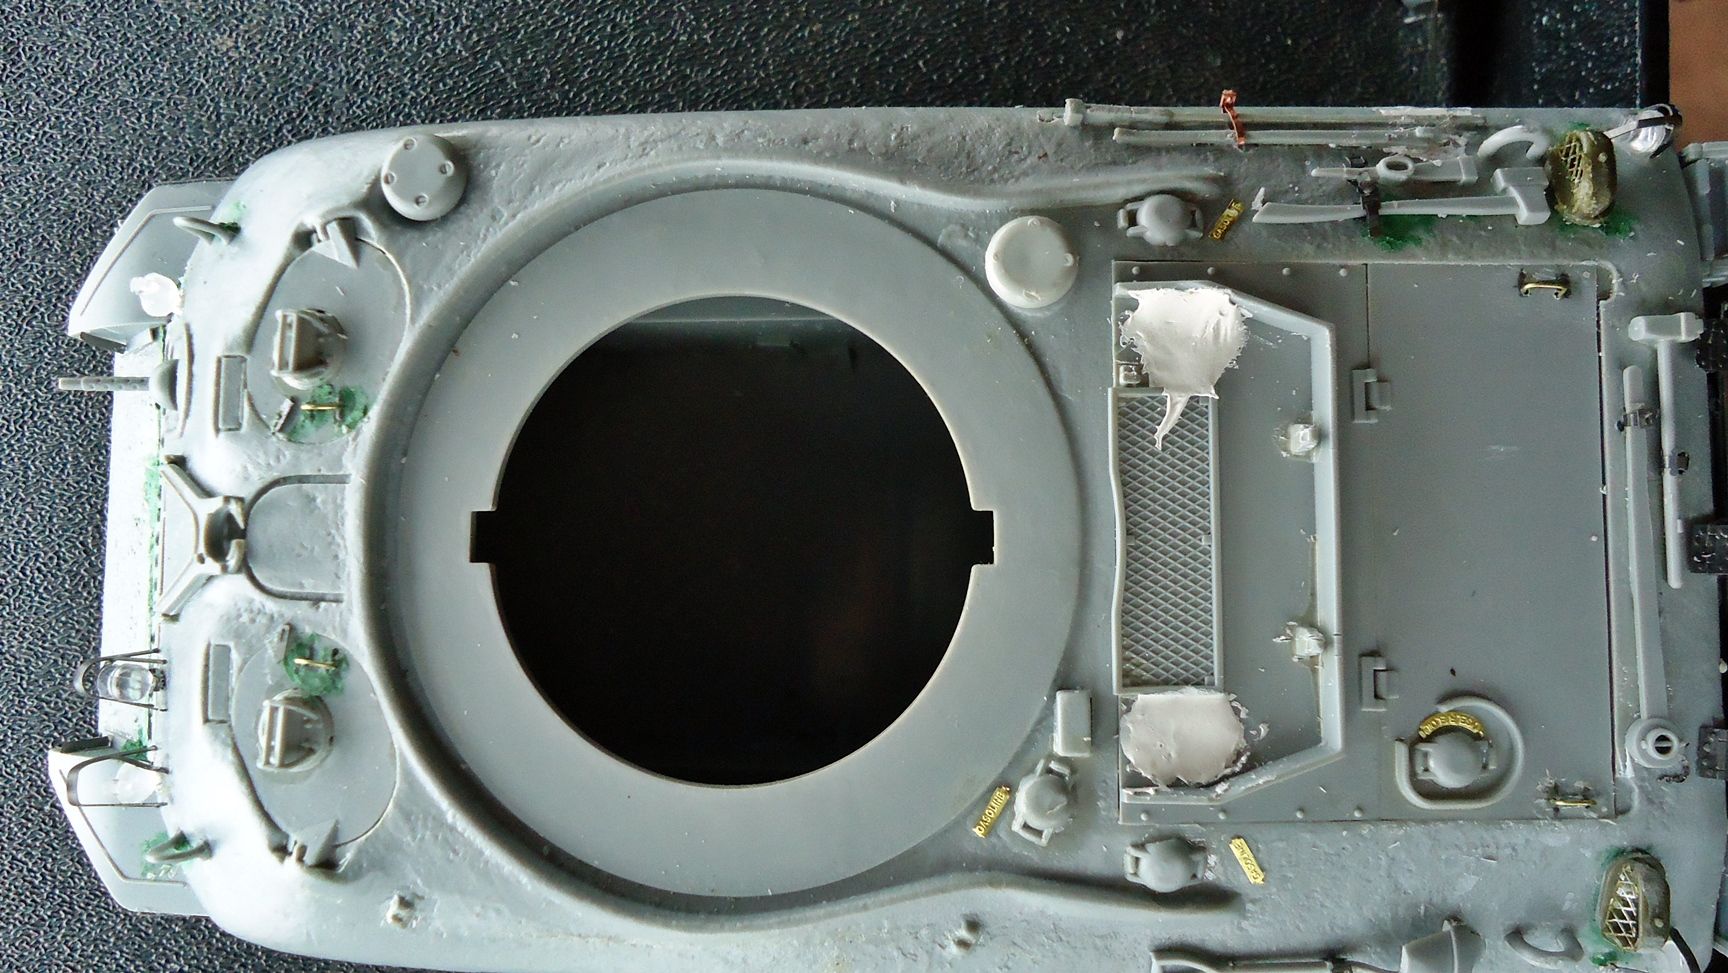
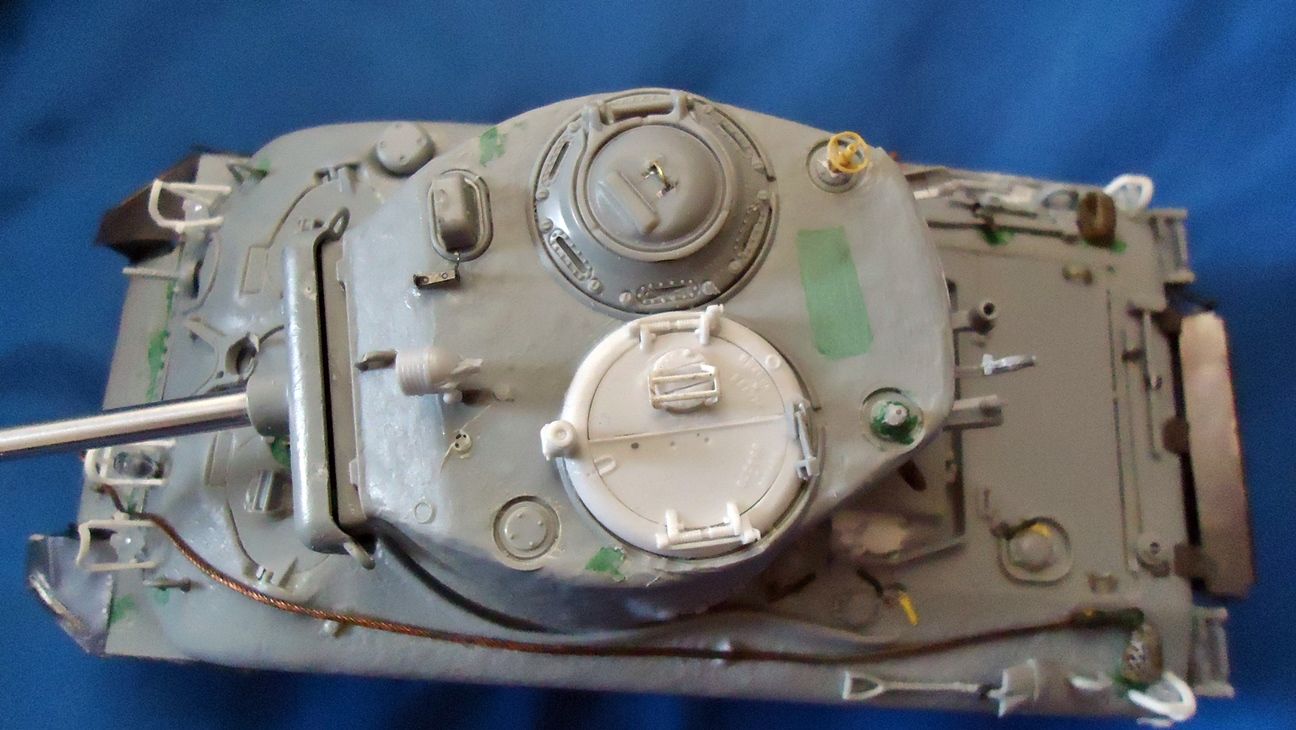
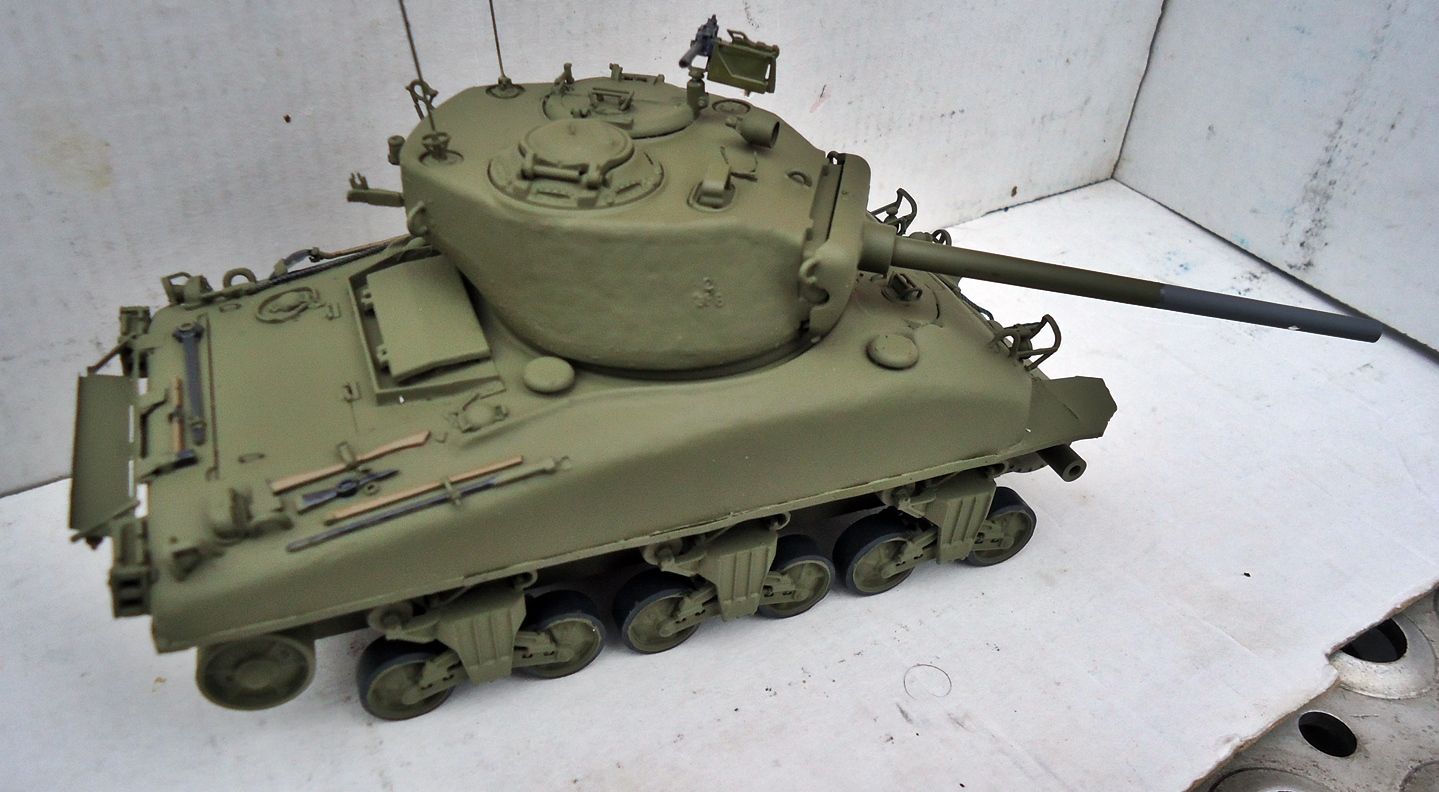
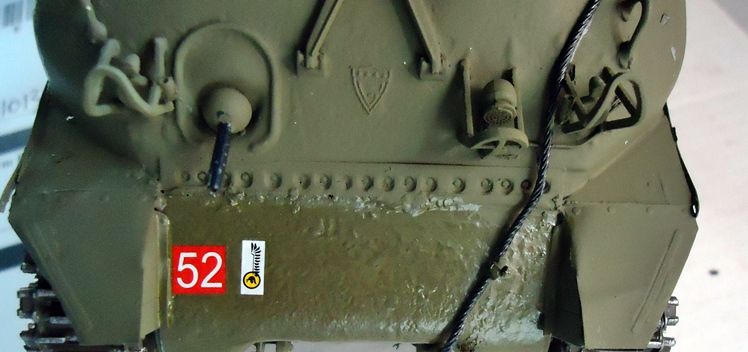
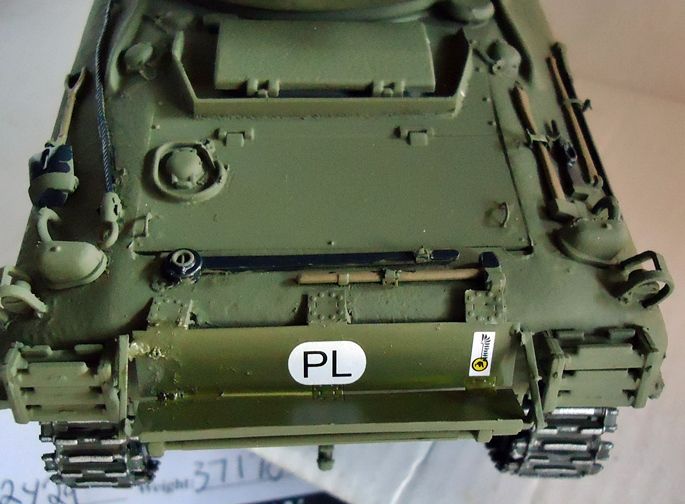
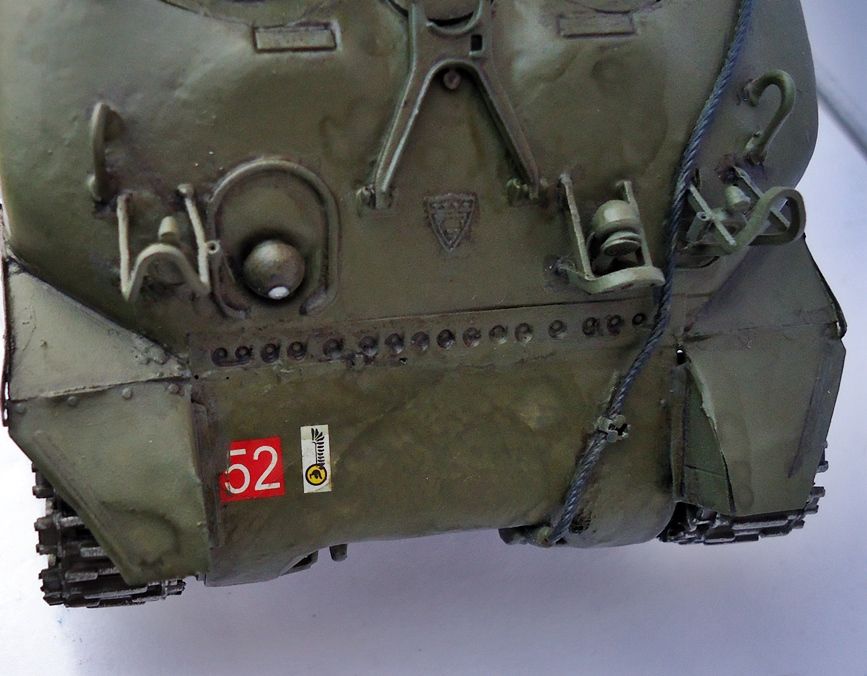
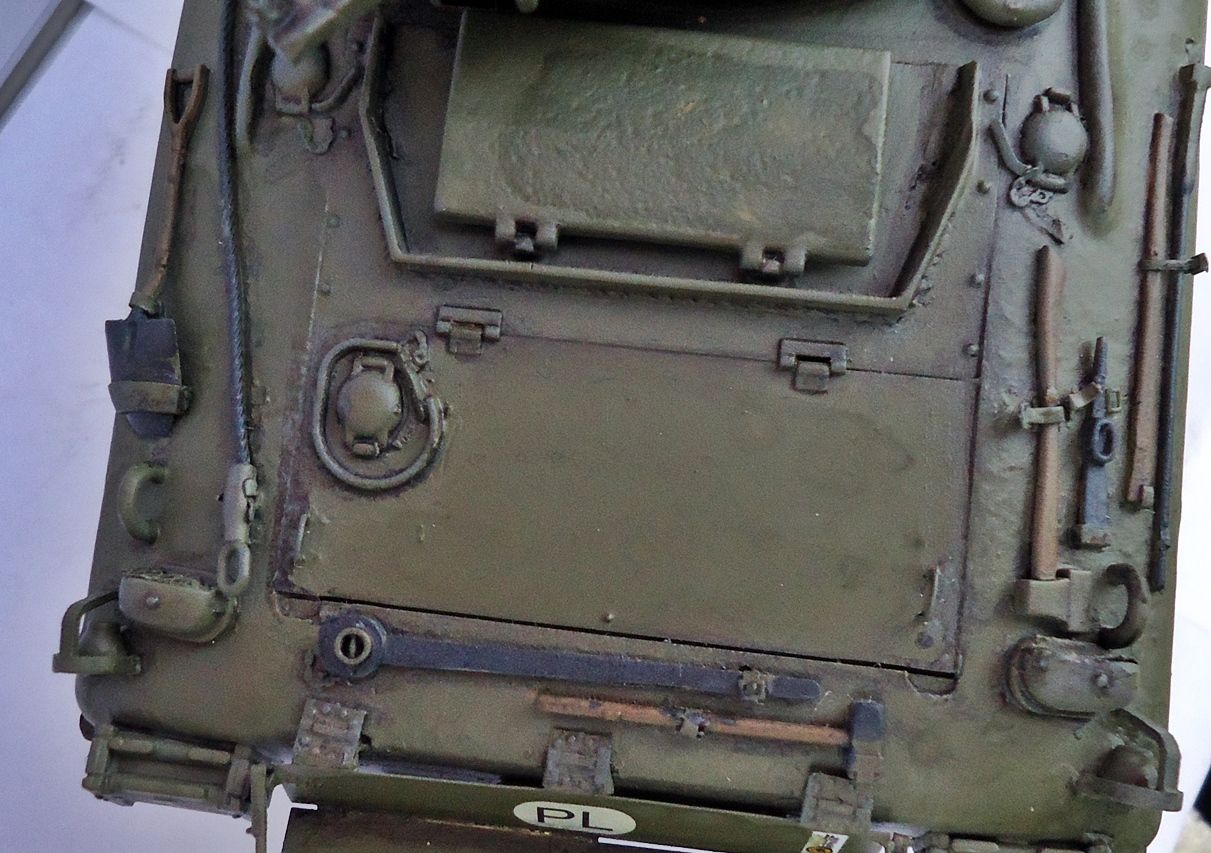
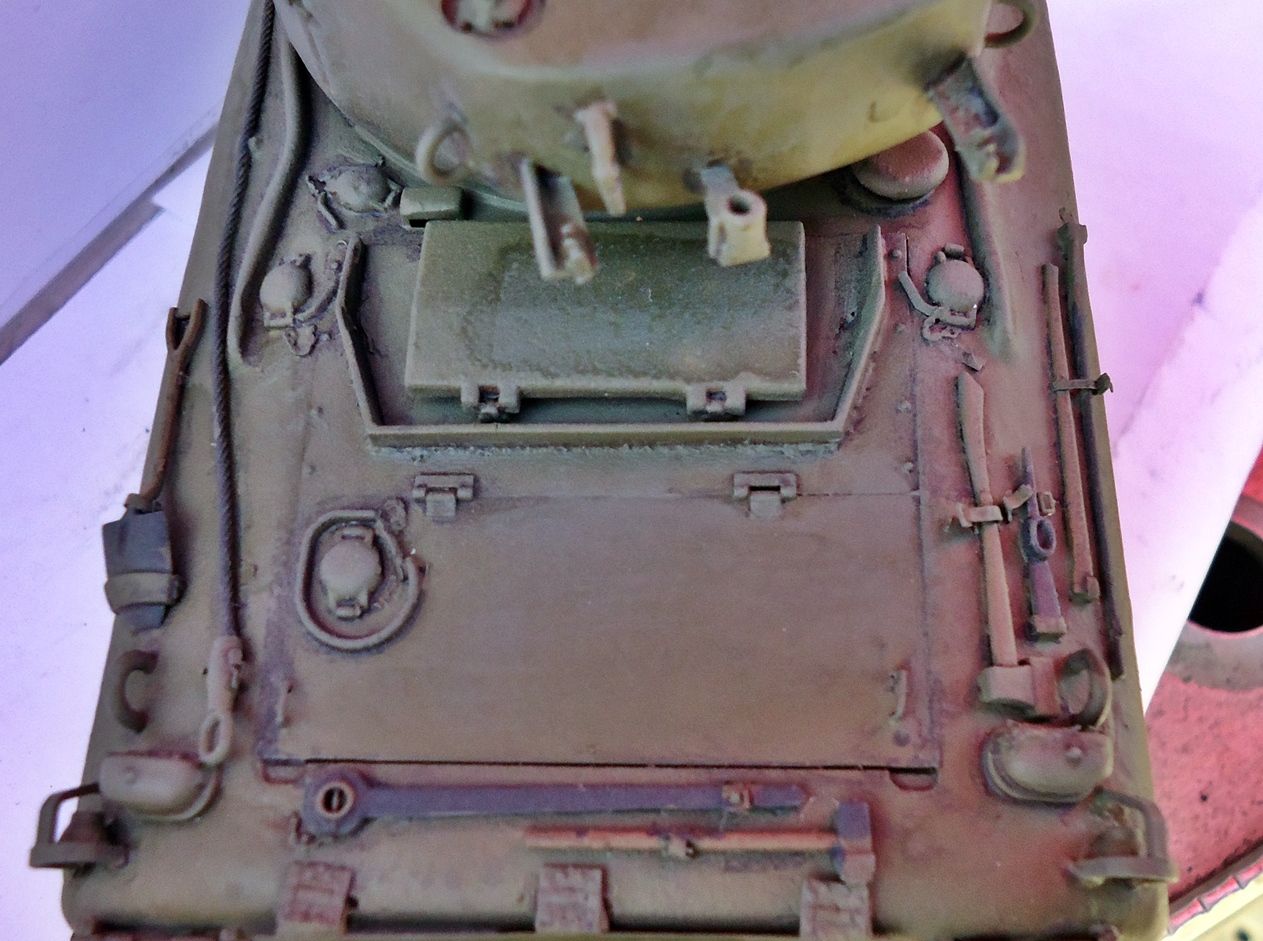
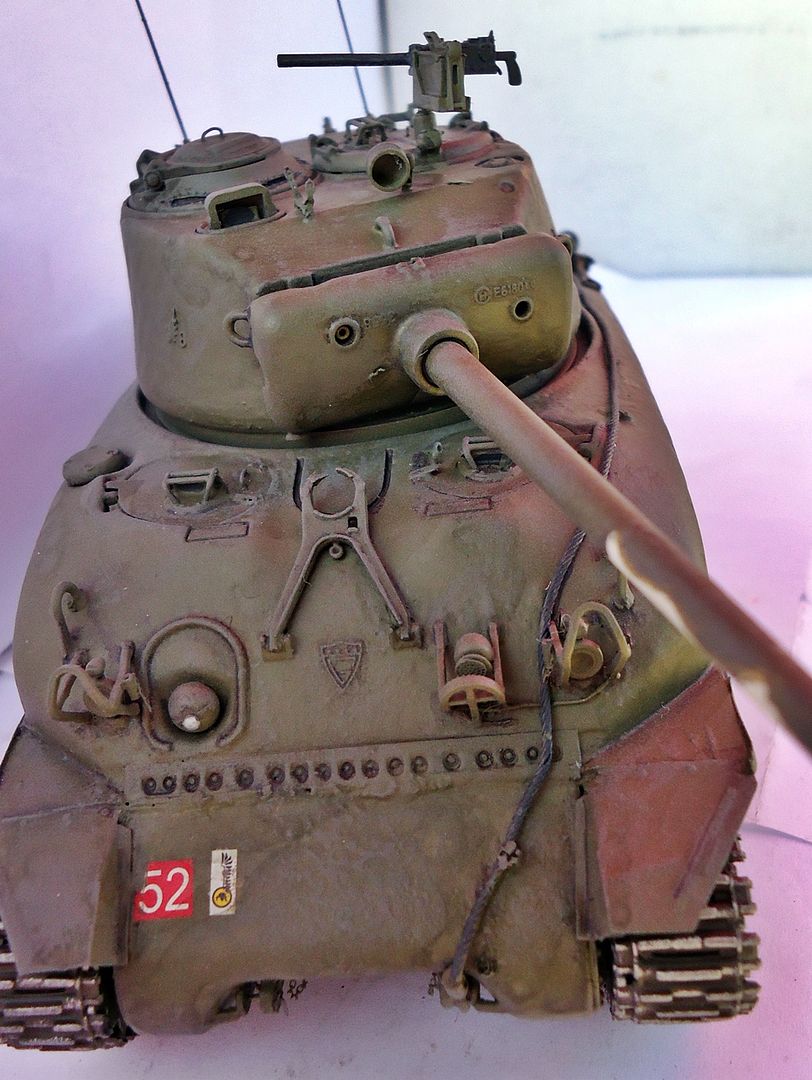
This is a shelf queen from some years back. This will be done as a Polish first armoured tank in Holland. Would this 76 mm A1 have the two antennas for the Mark 19 radio? Paint................. Olive Drab,or SCC 15,British OD?
A tank filled with holes.
For that is what shall become.
Boom we go.
Goodbye.
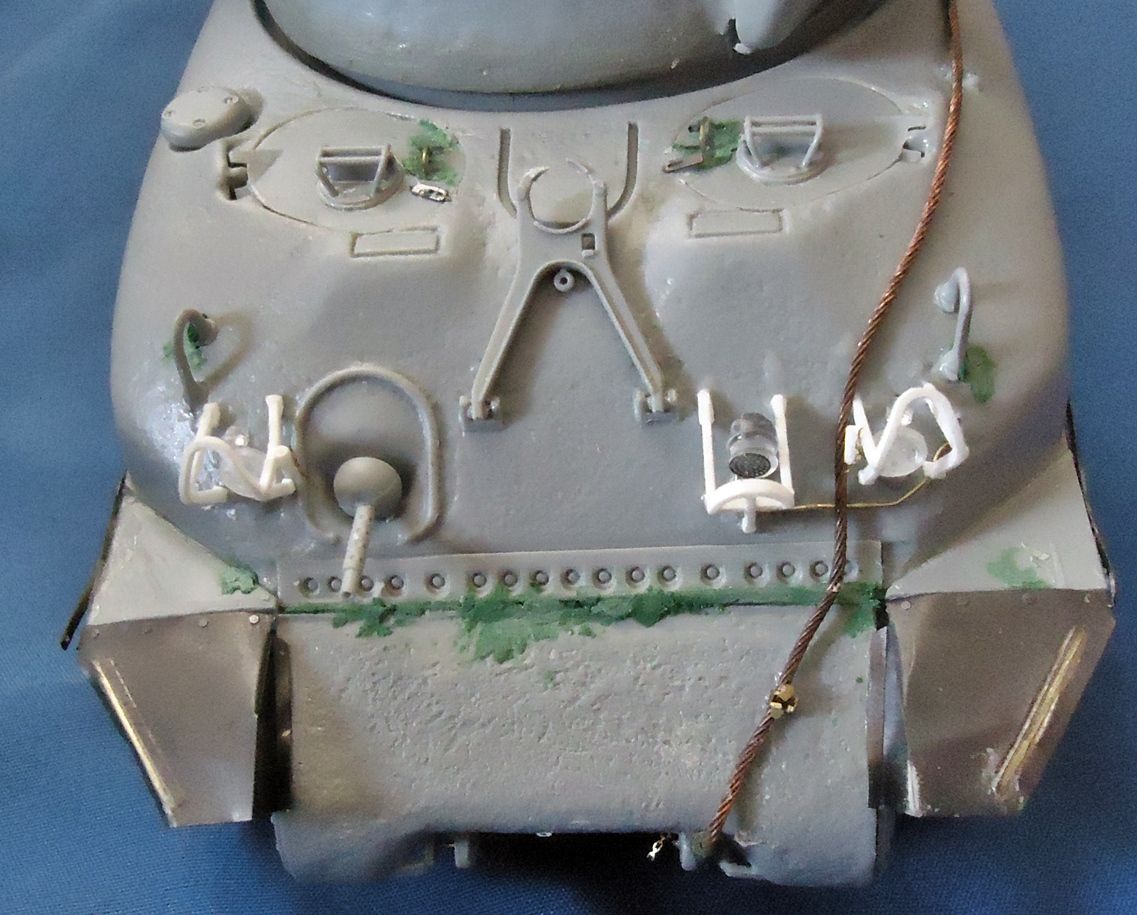
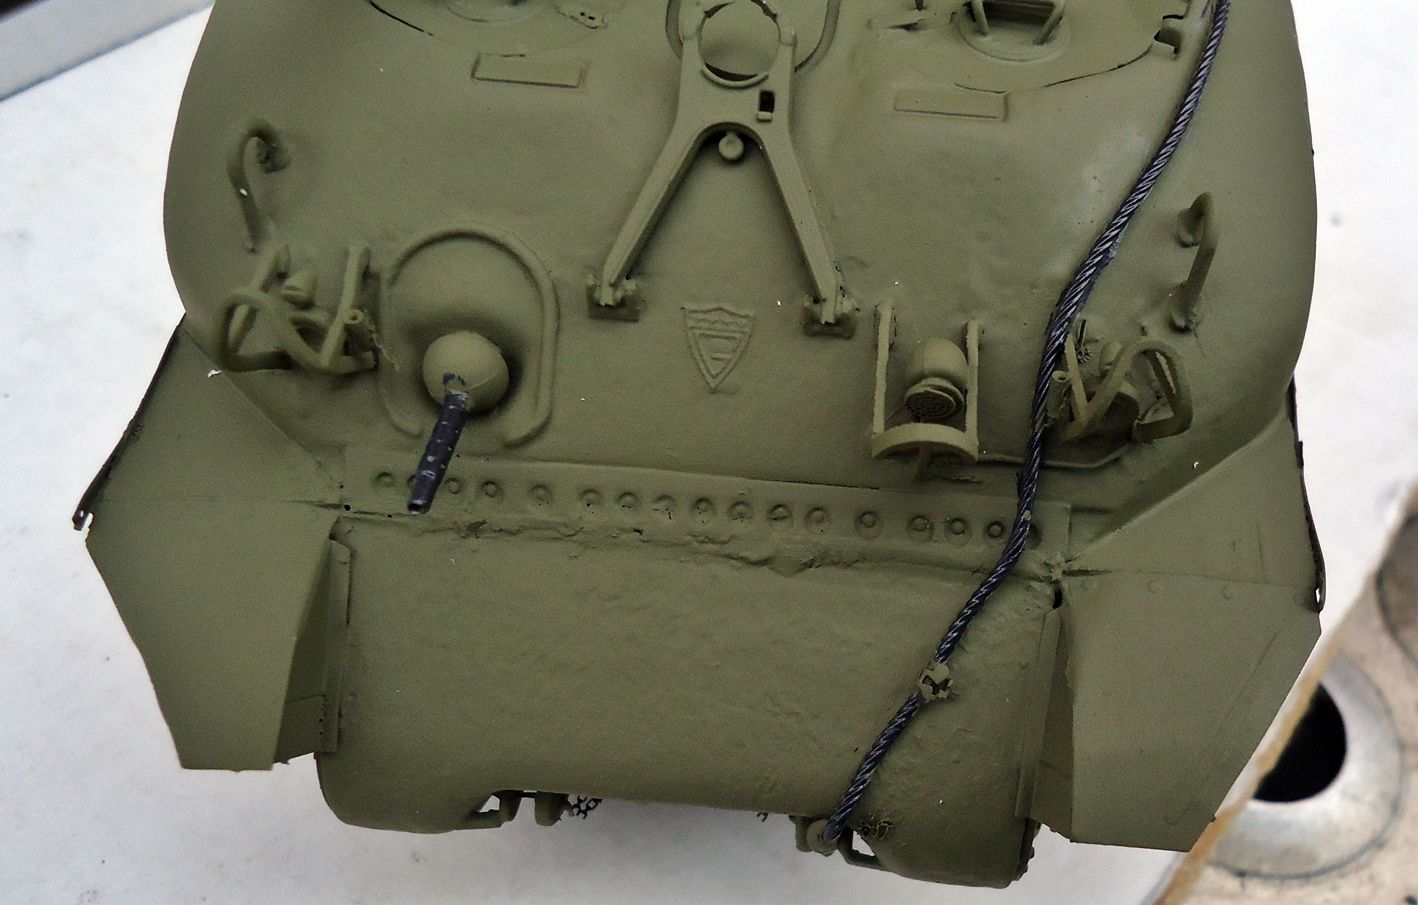
Hey! I did the same thing with my Dragon kit some years ago! Yes, for the 19 set it should have both British aerials in the antenna sockets and be in US Olive Drab. If you can pop off the armored intake lid without damage, it will make getting rid of the filler caps easier (which I missed on mine). I did mine covered in spare-track armor. It's a little worse for wear now (bow MG broken and missing, among other things), but maybe I'll shoot a photo and post it on this thread as inspiration. More later...
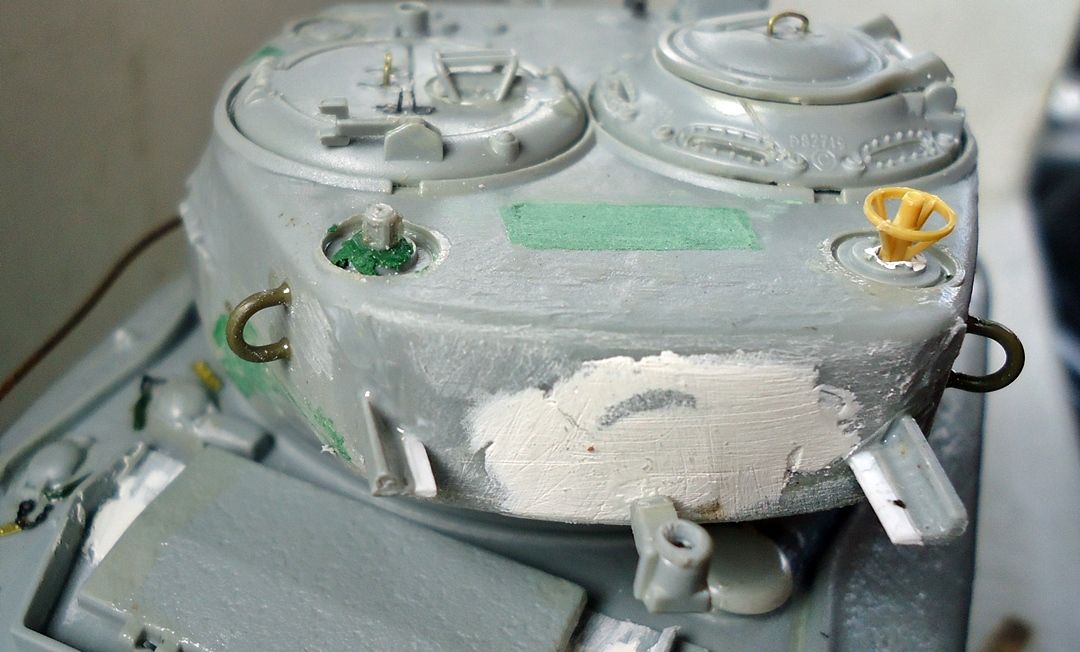
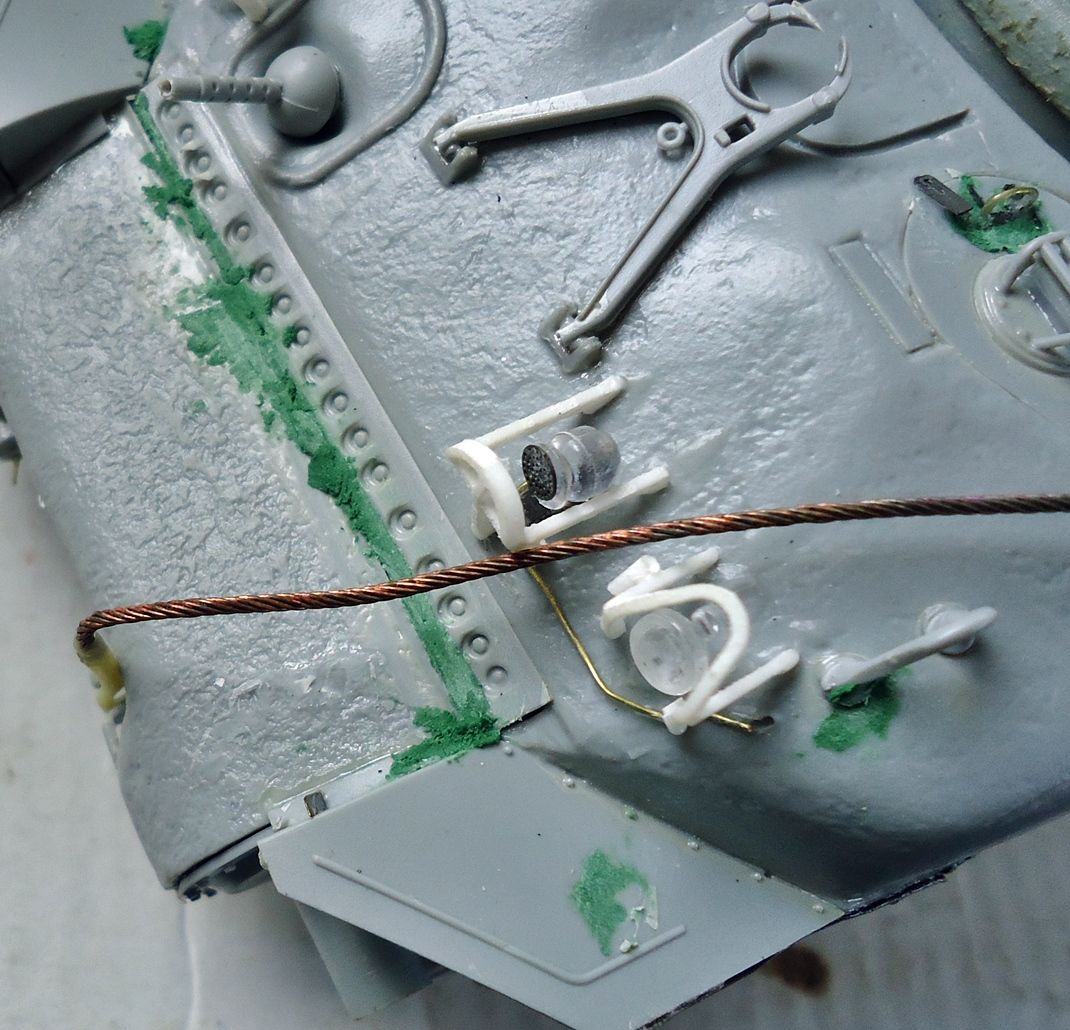
Thanks! The bottles are old Accurate Armour items in the usual gray resin. After clean-up, they got shot with primer followed by Chrome Silver enamel for reflectivity. Once fully cured I masked off the top of the bottles and shot the lower portion with Tamiya Clear Red; a couple of coats provided sufficient depth. Then off with the masking, and clear green over everything, followed by touch-up for the cork on top. Not hard at all, just time-consuming.
"You could probably use some armor. A Sherman can give you a very nice...edge!"
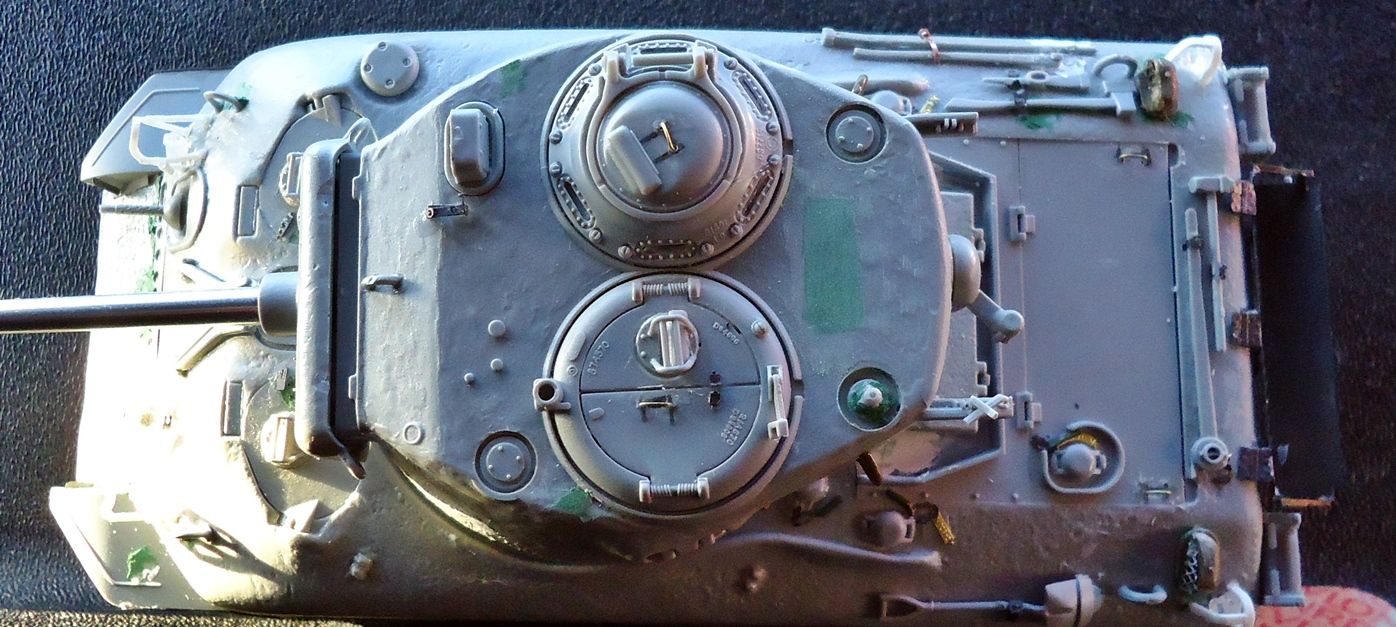
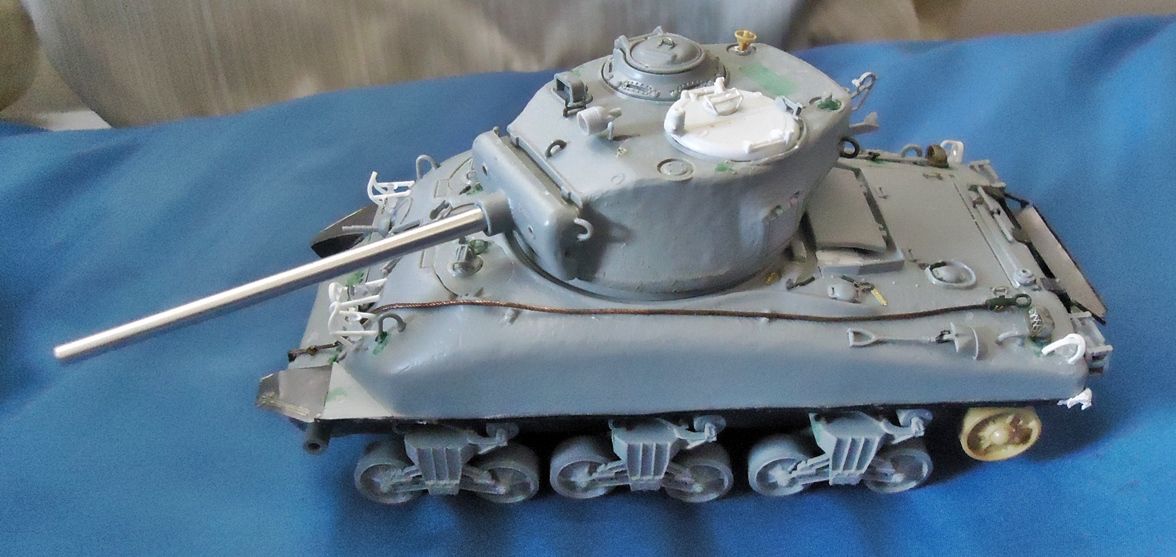
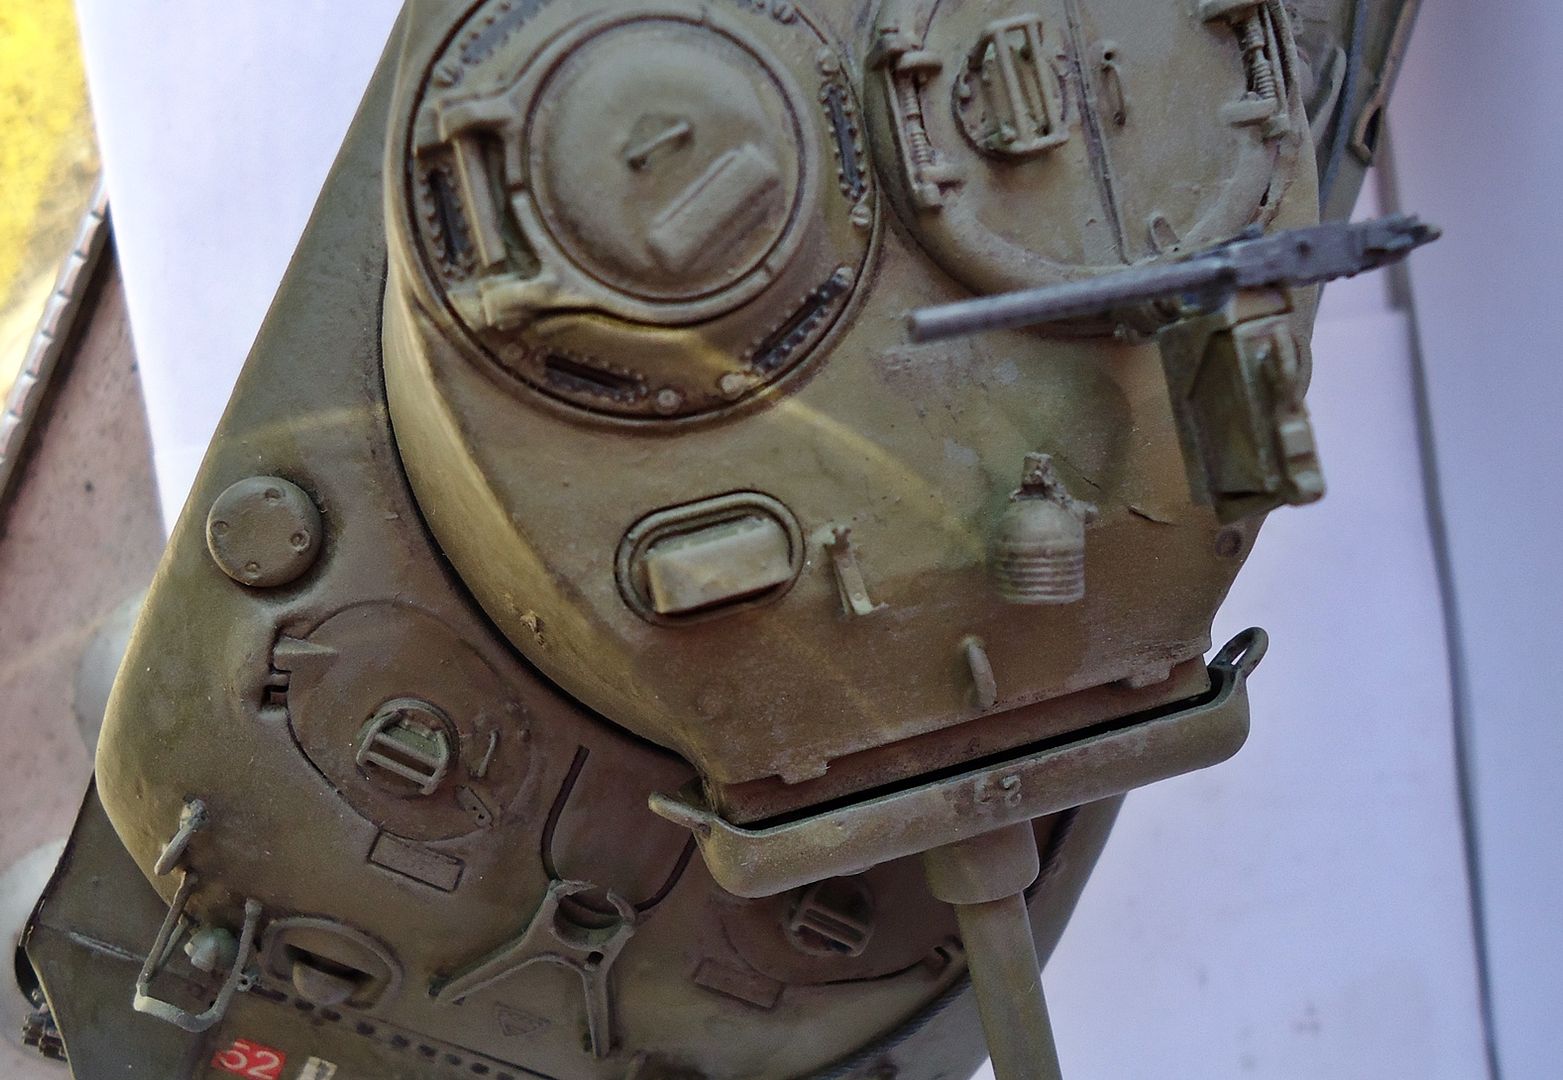
Hey zod...looking good. I had to pull out my op cobra im working on but here are some answers. If you are going with the turret with no blower, you need the cross pin loaders hatch. I cant remember the part number for the life of me but Tiger Model Design makes one (I think the only one). You can modify the kit part by adding a stop on the 2 back hinges on each hatch plate and then add a pin and beefier mount to the ring. For me it was easier to just buy the correct one. The .50 pintle mount on rear of the turret needs to be moved farther to the left and there should be the barrel clamp between it and the angle iron.
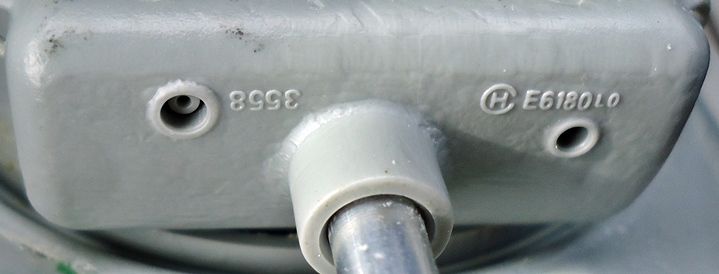
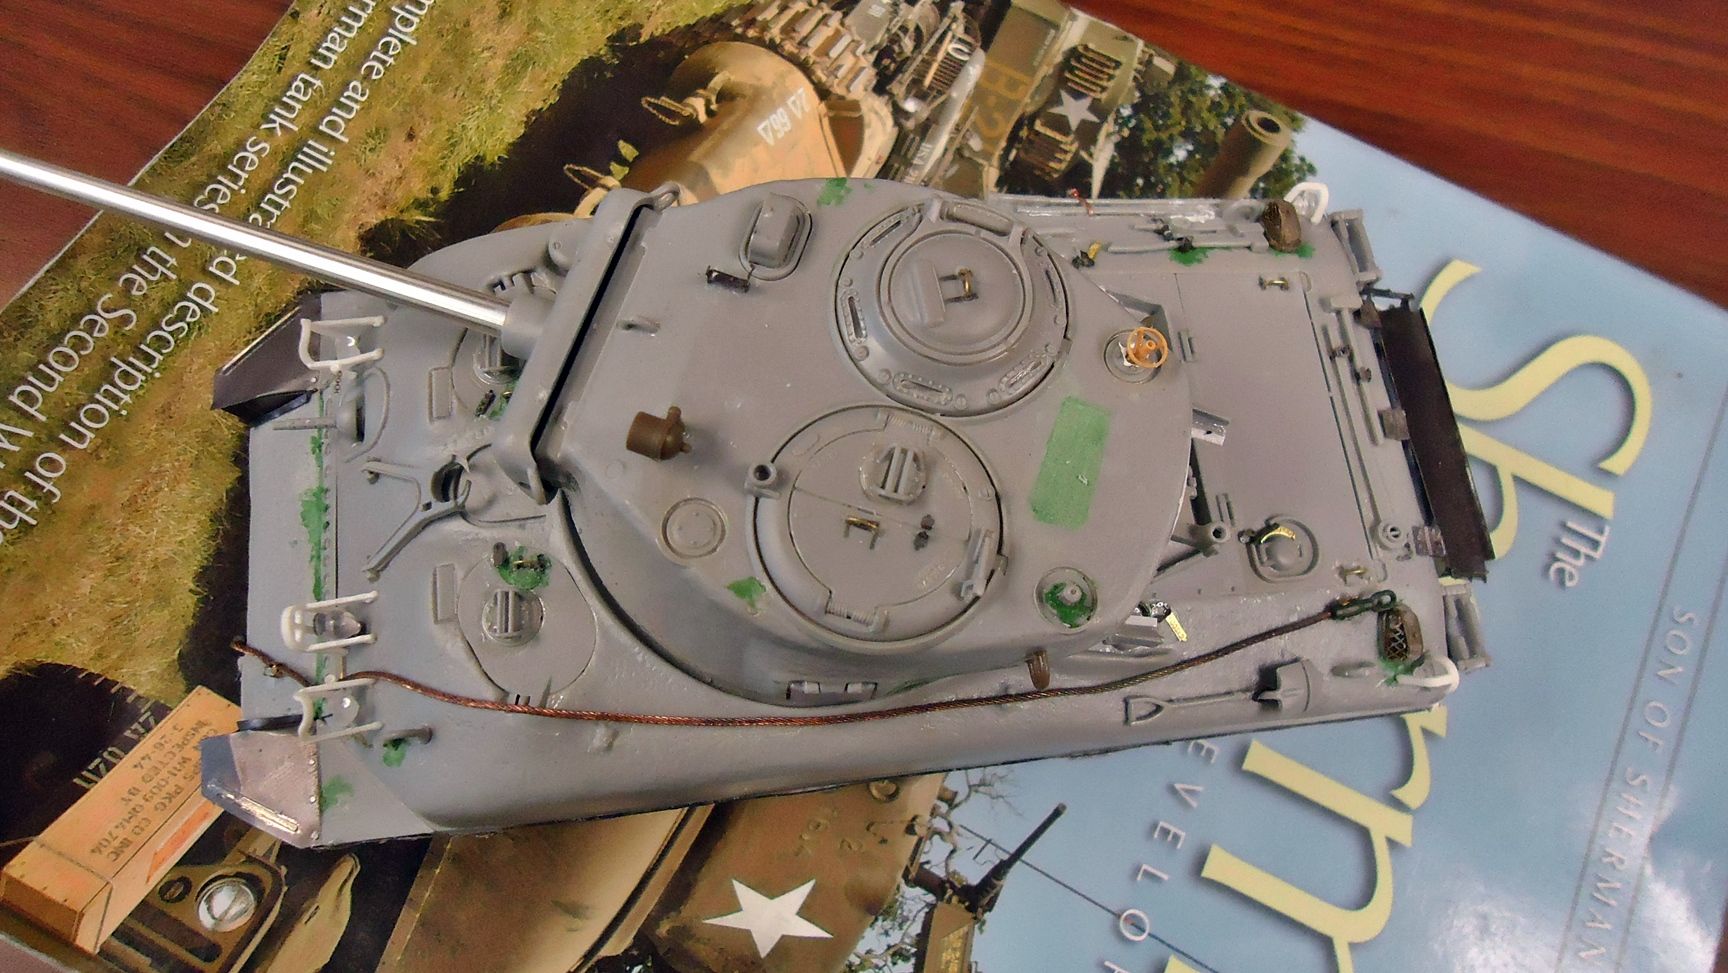
The casting numbers on the mantlet are adequate and your tow cable is fine. You could still add the clamp from the earlier pic and leave the cable how it is. One thing Dragon screwed up are the front fenders...tho fix, just scribe a line straight across right about where the fender hits the tranny cover and the bolt holes (right where that last little bolt is on fender, get rid of the 6 bolts along the edge of the hull and trim back the bracing a little and add 3 bolts across. Not sure how well my pics are but if you go back and look at my Op Cobra in the build log it might help.
Jeff, Thanks for the info. I tried to make the barrel clamp from the PE set I have. That was a bust. I will be home in two weeks or so. I know I have a plastic one.
A tank filled with holes.
For that is what shall become.
Boom we go.
Goodbye.
Hey zod...looking good. I had to pull out my op cobra im working on but here are some answers. If you are going with the turret with no blower, you need the cross pin loaders hatch. I cant remember the part number for the life of me but Tiger Model Design makes one (I think the only one). You can modify the kit part by adding a stop on the 2 back hinges on each hatch plate and then add a pin and beefier mount to the ring. For me it was easier to just buy the correct one. The .50 pintle mount on rear of the turret needs to be moved farther to the left and there should be the barrel clamp between it and the angle iron.
The casting numbers on the mantlet are adequate and your tow cable is fine. You could still add the clamp from the earlier pic and leave the cable how it is. One thing Dragon screwed up are the front fenders...tho fix, just scribe a line straight across right about where the fender hits the tranny cover and the bolt holes (right where that last little bolt is on fender, get rid of the 6 bolts along the edge of the hull and trim back the bracing a little and add 3 bolts across. Not sure how well my pics are but if you go back and look at my Op Cobra in the build log it might help.
Ah, color. I like this one. I attempted a similar model a few years ago with the Italeri kit, I still have it stuck in a box somewhere, and used some old Verlinden dry transfers. Ten years ago, I liked it, but it's in the "give to kids" box now.
Ah, color. I like this one. I attempted a similar model a few years ago with the Italeri kit, I still have it stuck in a box somewhere, and used some old Verlinden dry transfers. Ten years ago, I liked it, but it's in the "give to kids" box now.
Thanks kindly Rbaer. A slow time in trucking. I was able to get more work done on her.
A tank filled with holes.
For that is what shall become.
Boom we go.
Goodbye.
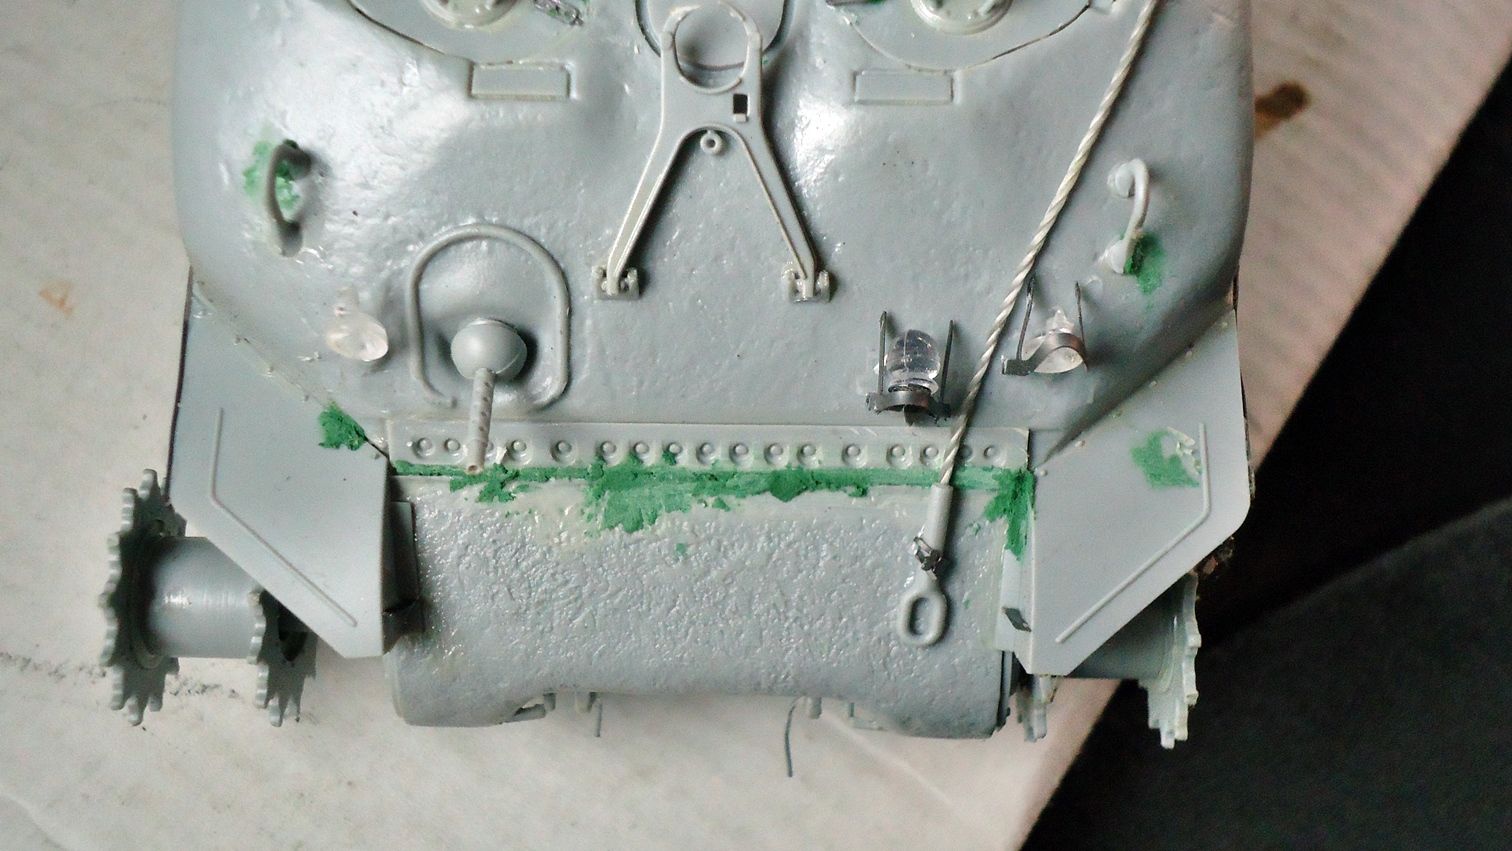
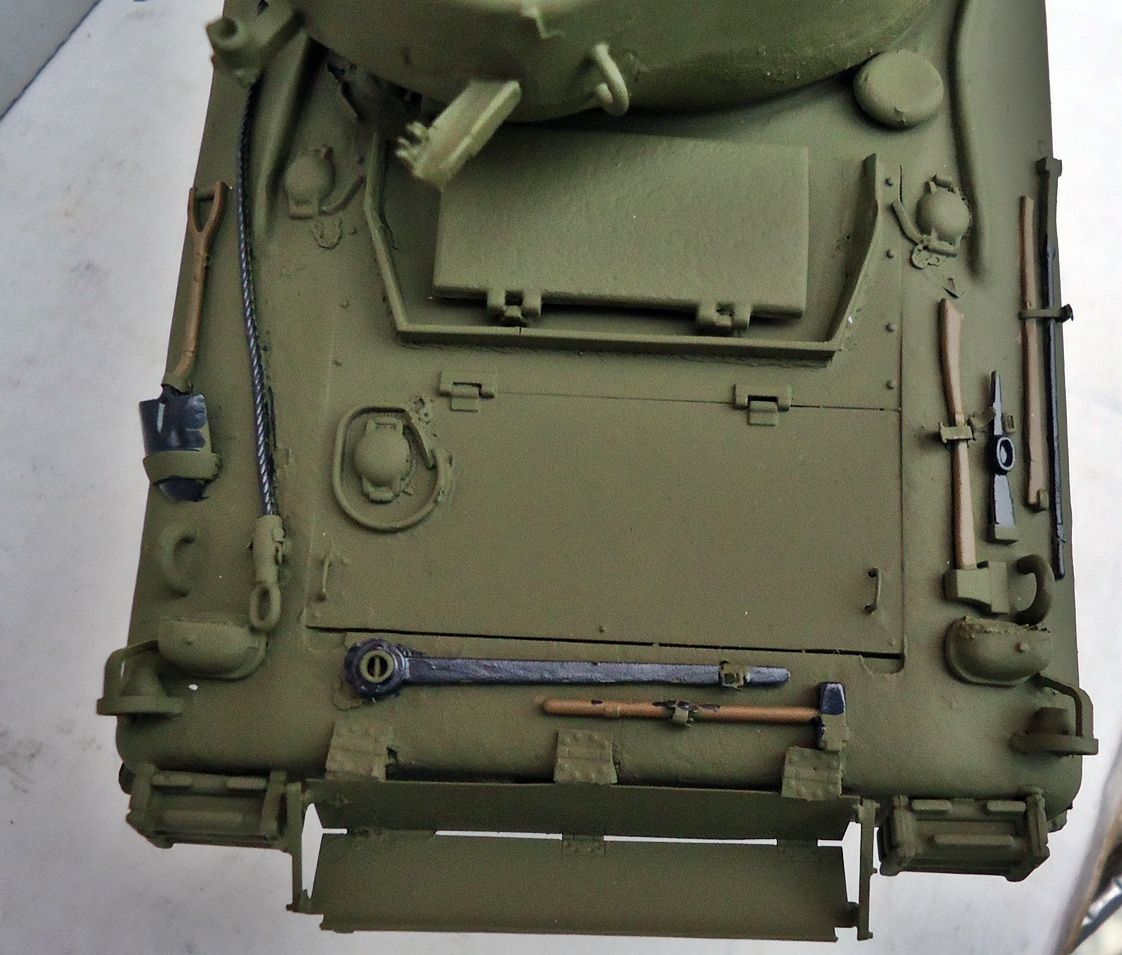
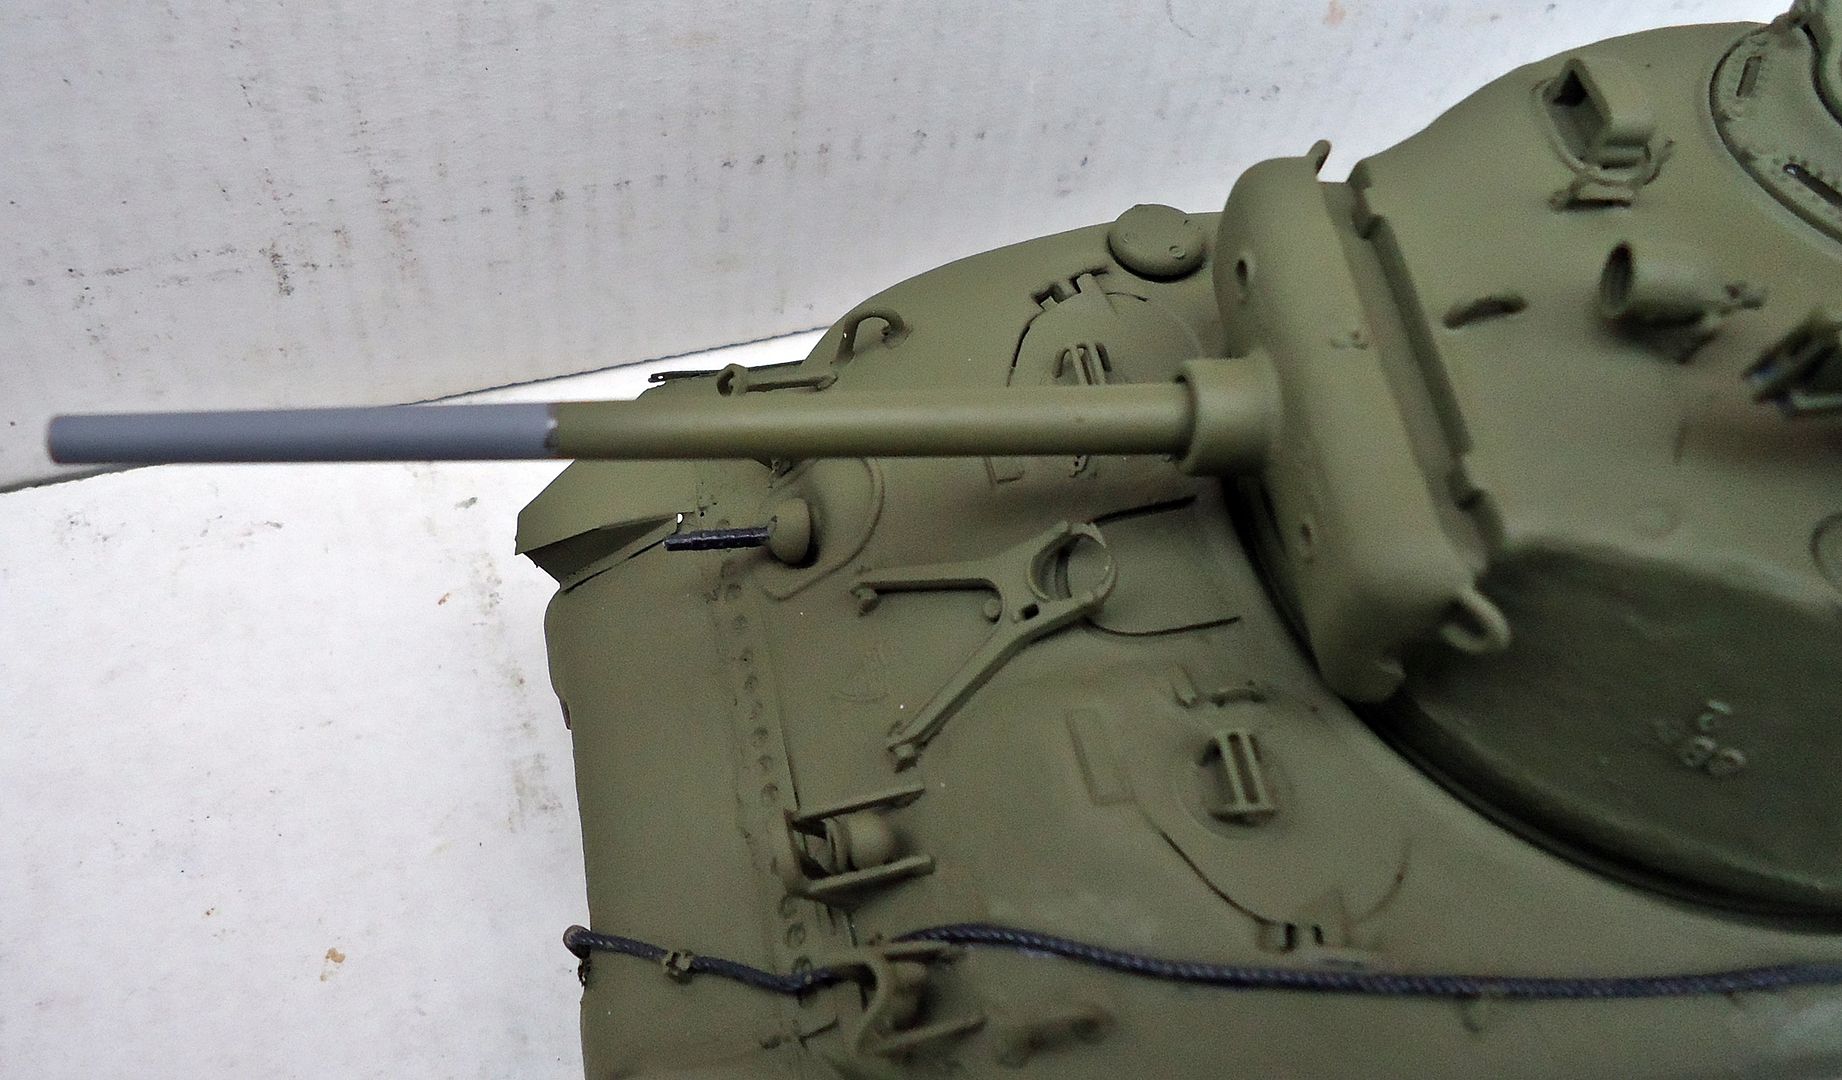
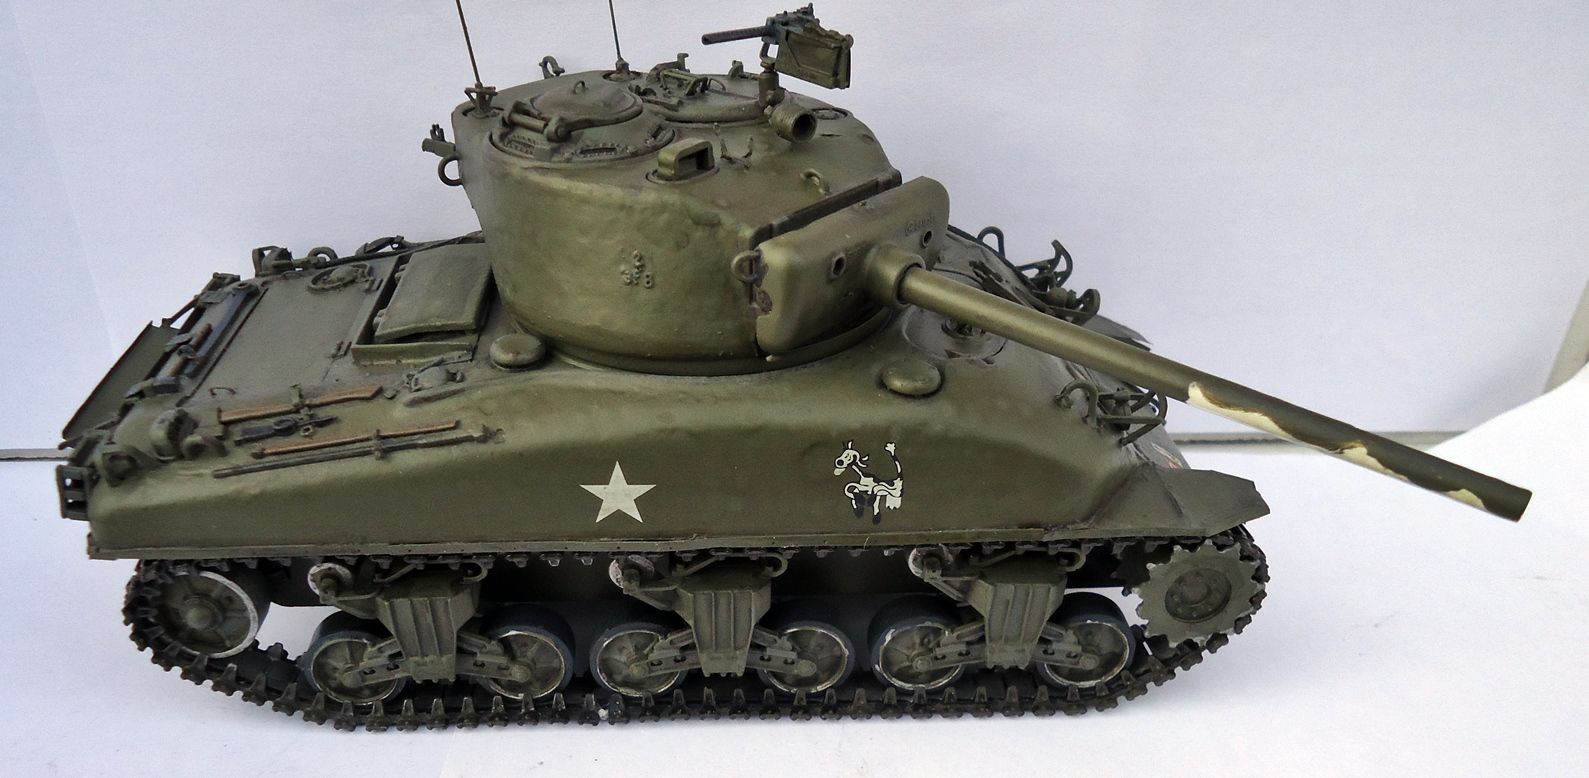
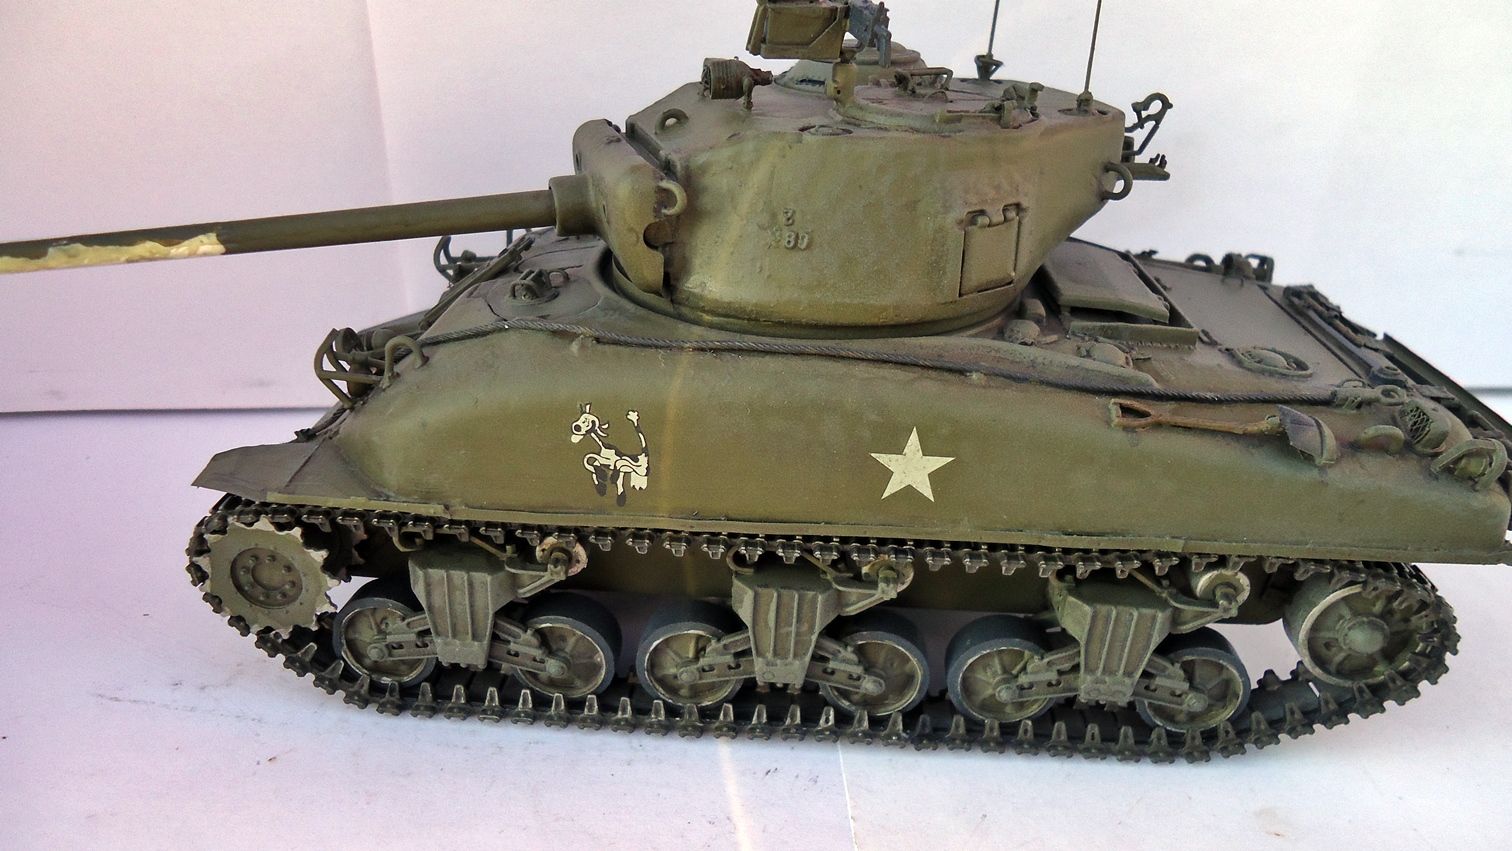
Looking real good!! Just an idea...I know the brits painted the upper barrel above the white in a dark green for more contrast. Don't know if Poles did or not.. Just a thought. Now if I could just get 2 seams filled and stowage done on my Op Cobra....
Looking real good!! Just an idea...I know the brits painted the upper barrel above the white in a dark green for more contrast. Don't know if Poles did or not.. Just a thought. Now if I could just get 2 seams filled and stowage done on my Op Cobra....
Jeff
Thanks Jeff.
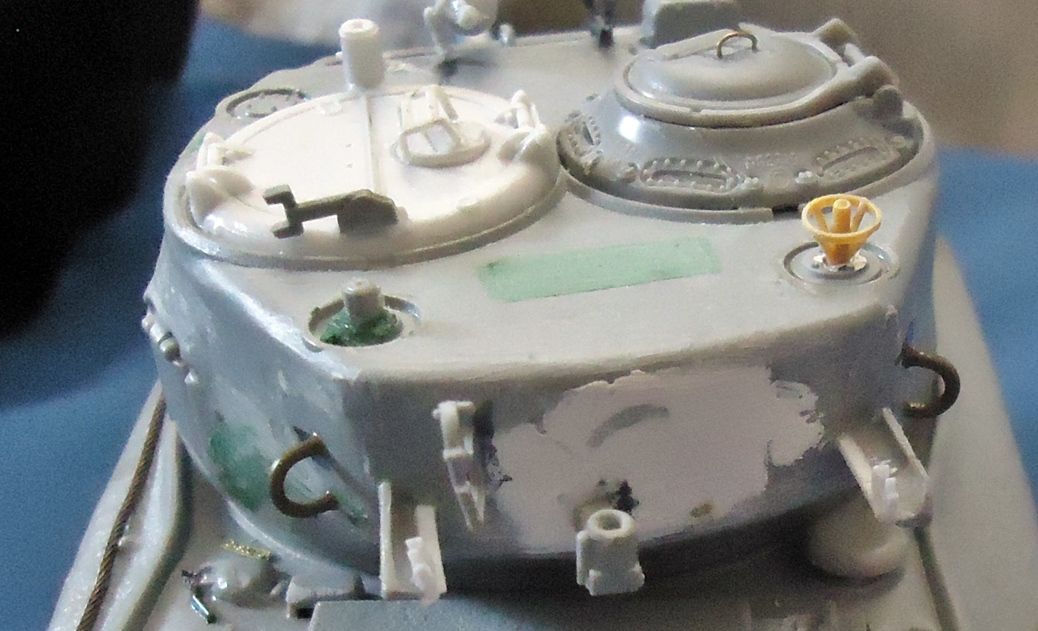
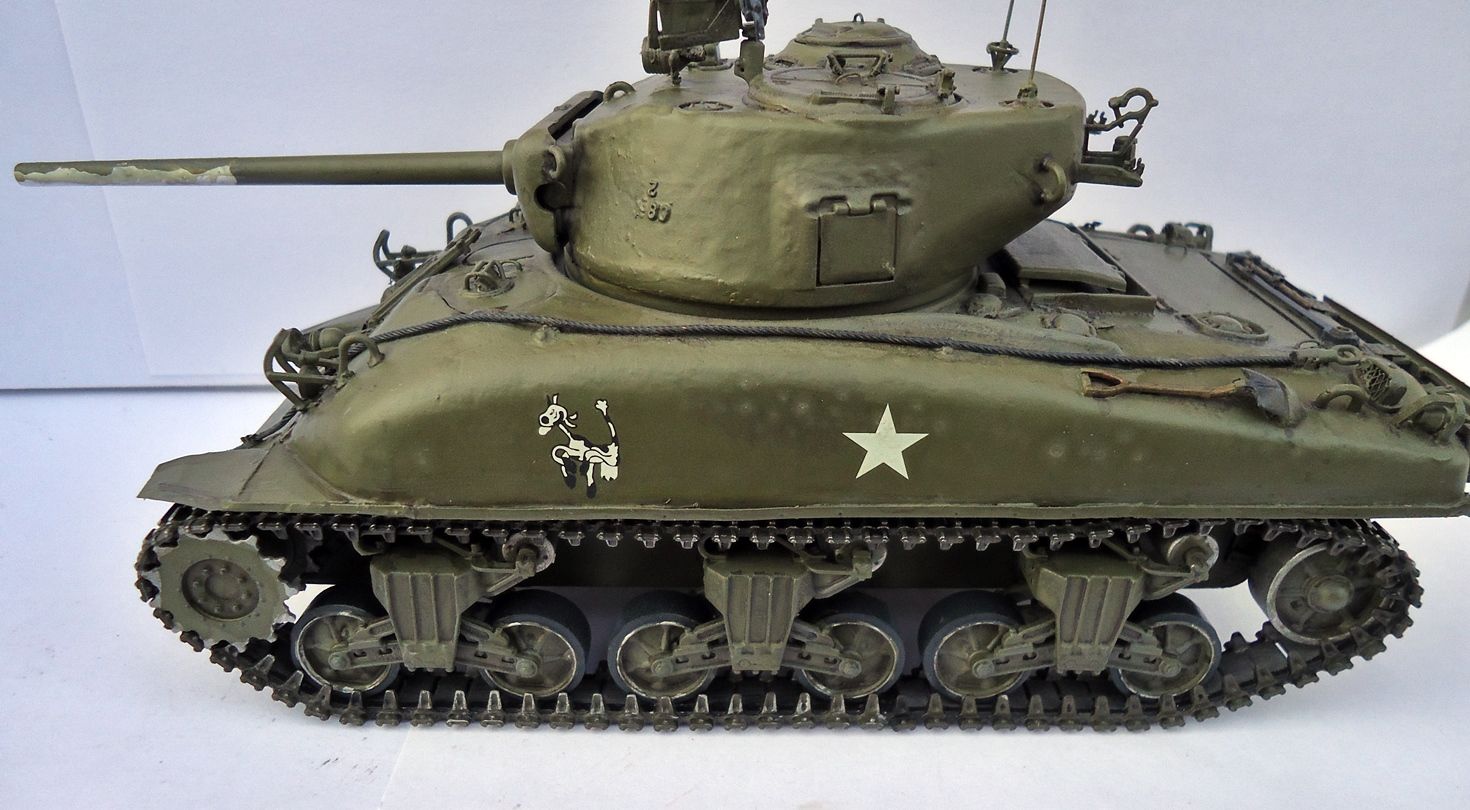
On this one that I am modeling,the crew did use the counter shade on the barrel.
A tank filled with holes.
For that is what shall become.
Boom we go.
Goodbye.
Looking real good!! Just an idea...I know the brits painted the upper barrel above the white in a dark green for more contrast. Don't know if Poles did or not.. Just a thought. Now if I could just get 2 seams filled and stowage done on my Op Cobra....
Jeff
Thanks Jeff.
On this one that I am modeling,the crew did use the counter shade on the barrel.
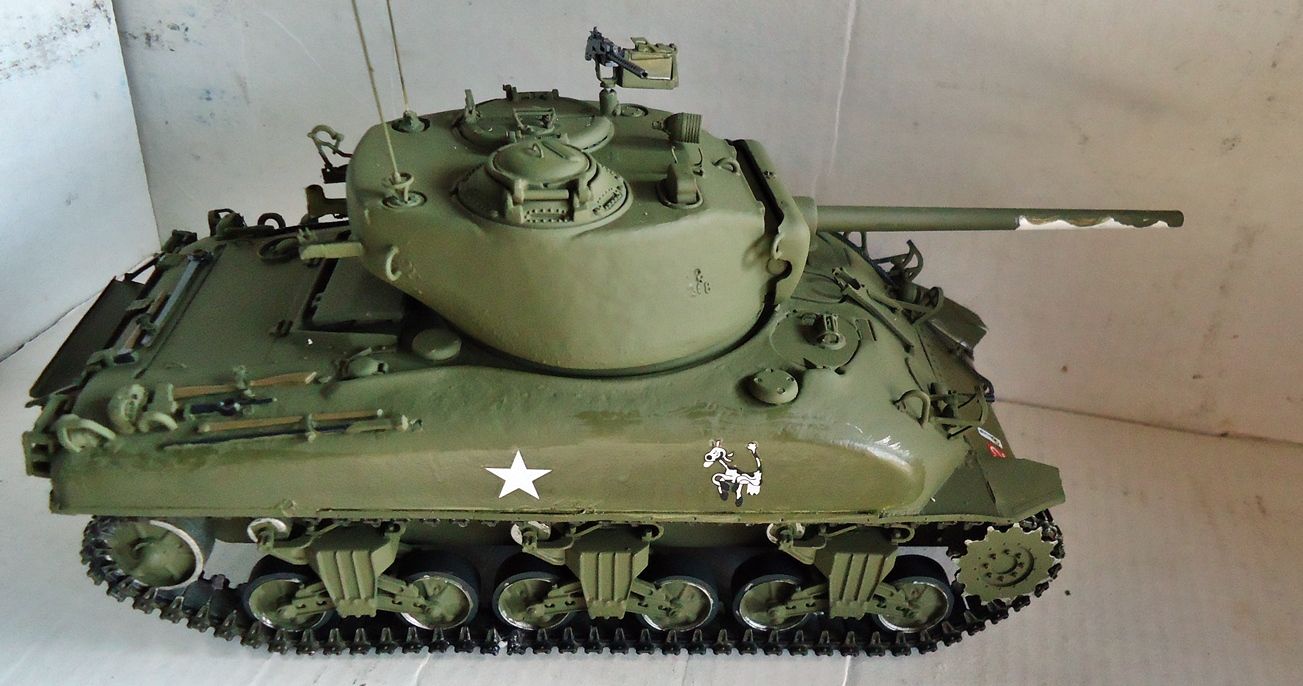
I've seen the pic, unusual but true. I did the same tank, less detailed, just because I liked the pic of the TC holding a cup (bucket) under the cow as if to get milk.