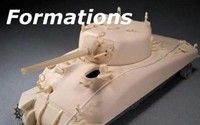
From the Tamiya M51, M4 "early" and Academy M4A2/76, an IDF M4A1E8/76, Six Days War. 
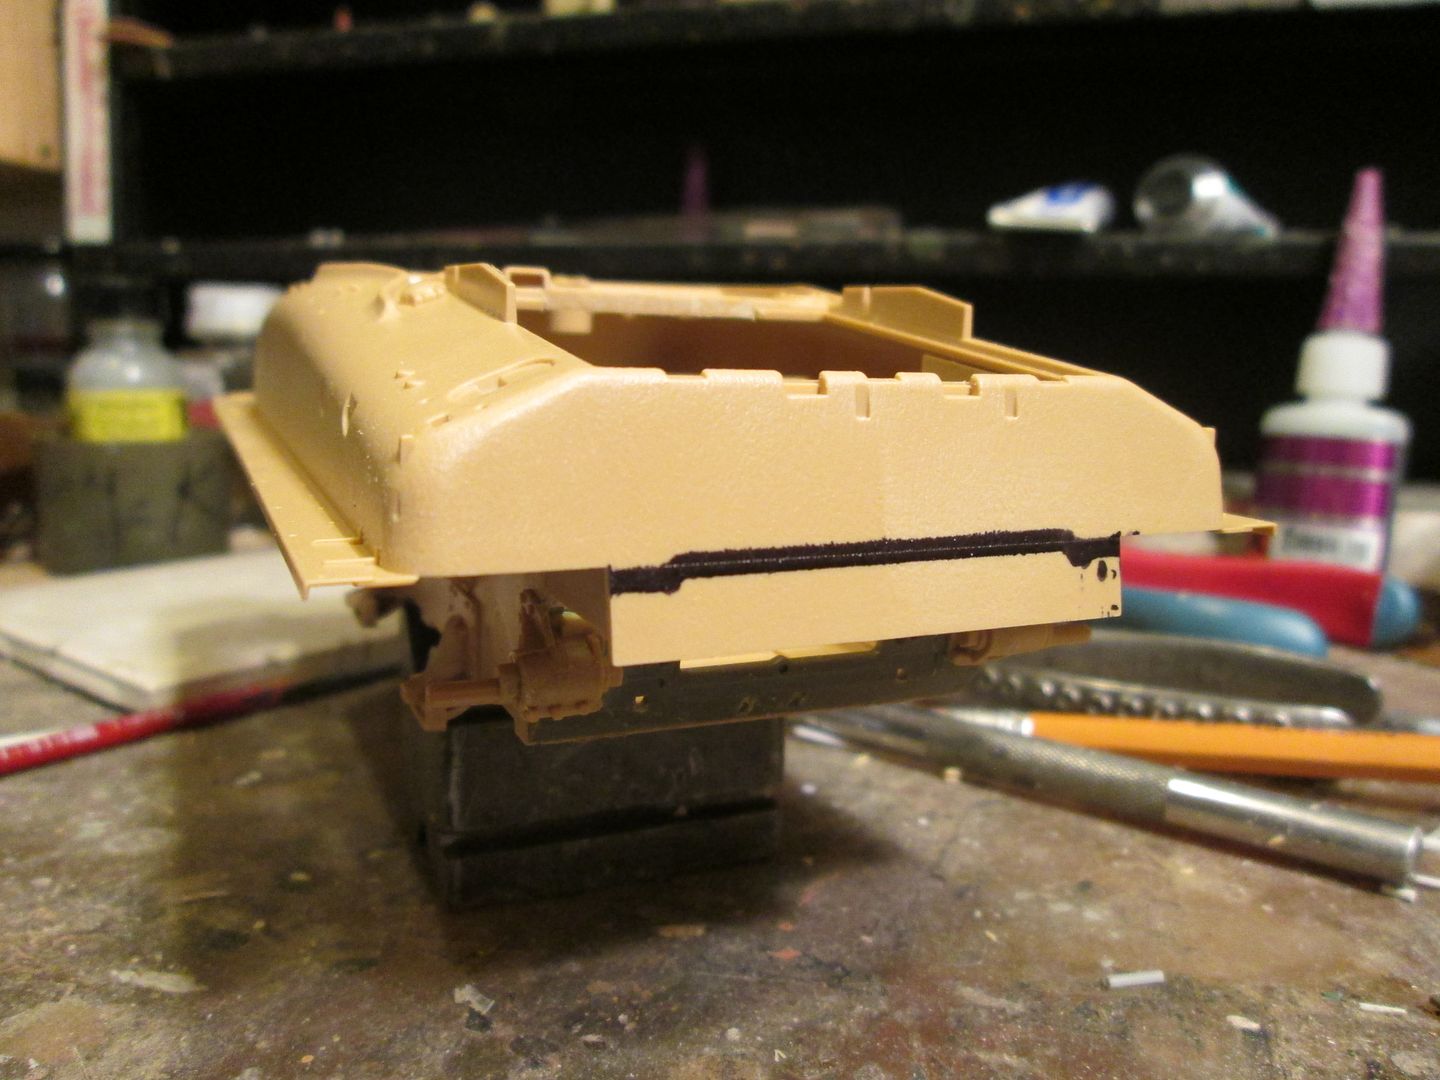
I began last night by assembling the M51 lower hull and, after removing the VVSS idler mount bases, sliding in the M4 rear plate. This was a drop-in fit, very nice. I then removed the HVSS idler bases from the M51 rear plate and installed them on the M4 rear plate. Gravy so far. I then took a little bit off the top edges of the M4 rear plate and attached the M51 rear upper sides pieces. If I had made a more careful cut here this would have been a "no-filler needed" join, but I had to use a teeny bit, all my fault. So far this has been a simple procedure. I took an old Italeri M4A1 upper hull, clamped it back to back on the M51 upper, and traced the edge with a sharpie, but didn't make the cut because I was thinking that the later cast hull might have been straight here, and the weld line Tamiya has molded here seems to support this. I'll check with Son of Sherman before I go any further. I've also started fitting the M4 engine deck pieces to the M51 hull, width is EXACT, only needing clearancing at the very front of the air intake, but, once again, need to check with SoS before cementing anything, as the M4 has a three piece cover, and I may need a two piece cover. Only one pic so far, I'll get more later, but this is the M51 upper hull just laid on the lower. You can barely see the M4 rear plate and M51 idler mounts, but it's almost like Tamiya thought this might happen one day. Now I've got to go take a look at what's been going on over here during my rather long absence.
Still moving. First, here's a better pic of what I did in the previous post: Evident here is that left over, I'll have most of what I need to do a Cummins rear plate on a short hull Sherman. Hmmm..... And the M4 engine cover parts, two in, and the last needing less that a half-mil removed for a perfect fit: Then all in, rear blended into hull, and rear of hull cut: And the ever-growing pile of spare Dragon bits, tools, gun tubes, etc, most of which will probably fing it's way onto this one. Cheers!
Looking good! Cutting off the hull extension was correct; only M50/M51 tanks built on this hull with Cummins installed would have that. These M1 Super Shermans were used in mixed formations with M50s on the Jordanian front in '67, and were prominent in the operations to surround and seize East Jerusalem.
"You could probably use some armor. A Sherman can give you a very nice...edge!"
Thanks! That's my plan for this one, still looking for the pic of one of these on a streetcorner in Jerusalem, need to see if I can see the markings. Between Son of Sherman and Mr. Gannon's IDF Sherman book, I shouldn't make any mistakes based on ignorance...
Let me rummage about the War Room. I have Manasherob's book on the M1 Super Sherman, though I think most of the images there are from training. I've also got Rabinovich's book on the battle for Jerusalem; it's a mid-side trade paperback so the image size and quality isn't great but I can at least describe what I see. Somewhere I've got the complete OOB for the Six Day War so I should be able to nail down particular brigades if not battalions.
"You could probably use some armor. A Sherman can give you a very nice...edge!"
So, the formation most involved in the fighting around Jerusalem was the 10th Armored Infantry "Harel" brigade. The tank battalion was the 95th, and it had a mix of M1 Super Shermans and M50 Shermans. Also part of the brigade were the 104th Armoered Infantry Battalion, the 106th Armored Infantry battalion, and the 41st Reconnaissance Company with AML-90s and jeeps mounting 106mm recoilless rifles. Other formations involved in the West Bank fighting were 4th and 5th Infantry Brigades, 161 Etzioni Jerusalem infantry brigade, and 37th Armored Brigade with M51s and AMX-13s. None of the images I have show markings clearly; all either too far away, too poorly reproduced, or from the wrong angle.
"You could probably use some armor. A Sherman can give you a very nice...edge!"
Thanks, and.... Superb info! On pg 40 of Tom Gannon's Sherman book is the pic I was thinking about, and I may take a little artistic license here and actually put the tank on the basketball court. Also on the same page, two tanks in what looks like the old section, also a possibility. Neither pic has much in the way of marking visible either.... only chevrons, and apparently it looks like quite a bit of stowage on the blanket rack. I can also need to tell I need to dig up an exhaust deflector. Friday night's progress: Most of what I've done is just assembling kit parts, with a little bit of mixing and matching going on. A dragon 1-piece gun tube fit the Academy mantlet after I bored the mantlet, the turret ring only needed a .020: shim around it's base to fit the Tamiya hull, etc. Details from the Tamiya M4 were added and the exhausts have some plastic tube running up into the engine area, the hull has had a bunch of un-necessary holes and such filled and blended, but the rest is just kit stuff. I'm not hugely impressed with the Academy turret, and almost robbed a Dragon kit for the turret, but decided that with a little basic enhancement, I could be happy with it.
Details on the turret, mantlet and hull hatches done last night, turret is now ready for detail parts. Brass is from an ancient On the Mark Sherman set, no idea on how long it's been stashed away.... This is really fast for me..... something's bound to go wrong soon.
This is almost a "speed-build" for me... Last night's progress: brush guards, blanket rack, and a little bit of work on the turret. Next should be tools, finish the turret, add some stowage and primer.
I found an exhaust deflector in my stash, looks like an Italeri part, and have a Tasca 50 cal for the turret mount, so now I'll have parts on this thing from every company that currently does complete 1/35 Sherman kits.
Go Russ Go! Have the same thing on my shelve of shame right now, I had decided to replace the suspension with the Tasca T-80 set and am using the Tamiya M1 kit for the M4A1 76 parts.
Regards,
Rod
That would be the way I would do it if I was in "tall corn", but I either picked up all this stuff at a show or had it in the stash already. That would save a lot of the filling and filing I'm doing. Also, I bought a stack of the Tamiya M4 "early" kits a couple of years ago for $10 each, and I'm down to three or four, plus one M4A3/105 kit. Having Shermans in the stash makes me feel good. I've gotten to the point where the M51 and M1 are on my "grab it regardless" list..... I really like how easy the Tamiya HVSS goes together, and in comparing it to the one model I have with the "new" Dragon suspension, it's pretty good. As I keep promising myself, I'll do a Tasca kit one day.....
Some more details: Tools are from Dragon and Tamiya, etch mesh on the grouser vents came from OTM, fit okay after some trimming and blending with MrSurfacer.
Looks great, Russ! Have you glued down the TC's cupola yet? Sometimes the IDF clocked the thing so that the hatch opens out to about 5 o'clock, if viewed from above and the gun is at twelve. Just one of those things to make it a little more different from the usual Sherman fitment. It's going to be nice...
"You could probably use some armor. A Sherman can give you a very nice...edge!"
TC cupola still not glued, seems like I remembered seeing that in a pic... thanks! I think the two tanks in the pic I'm working from have the TC hatches open, I'll see if I can finger it out from that, but I like the idea anyway, may do it just cuz.
Zod, thanks! Track detail is not the best, but passable. The guide horns are not hollow like the Dragon DS tracks, but the ridges on the outer faces of the links is deeper, probably "more correct" than Dragon. Length is good, and settle down after being on for a while so that they look "tight". The one issue I have with them is the minor amount of flash on the edges of each and every end connector. The material is glue-able with regular styrene cements.. I use MEK, sparingly! The tracks on this one have been painted but not weathered.... I was going to use them on the howitzer tank I put on the back burner a little bit ago but the guide horns don't clear the reservoirs on the shocks for some reason, so I used DS tracks instead.
Somebody slap me. In my exuberance in finding that the Tamiya M4 engine cover was such a good fit on the M51 hull, I failed to trip to the fact that it's the "Early" cover, and even when I was looking at plans, drawing and pictures during its fitting, and later during tool placement. Jeez..... so another Italeri M4A1 gave it up for the cause. Removal: Replacement: The good side of all this is two-fold: One, I feel better, and two, I can add the mesh inside the hull overhang because I haven't finish fitting the new cover and it's not glued in.
And.... Greg, is this the "5 O' Clock" position you were referring to? If you have Tom Gannon's IDF Sherman book, take a look at the pic of the two Shermans on page 40, looks to me like the one in the background does have the TC cupola positioned this way.
Nice catch on the engine deck, I would not have noticed until I had paint on it. Coming along nicely! Have you seen the Kaizen T-80 tracks yet? Been tempted to give them a try.
Yep, that's the positioning I was thinking of for the TC's hatch. And good catch on the engine deck. You probably could have carefully ground off the filler caps inside the splash rail and added the cap and rail to the rear plate. Grinding out the caps would have been a bit tricky. The French often fabricated the splash rail around the rear filler cap anyway, since they were modifying early decks, and filled in the openings for the ones inside the original splash rail. That's where the round weld patterns on IDF decks comes from; filling those holes.
"You could probably use some armor. A Sherman can give you a very nice...edge!"
Thanks, guys. Rod, I've seen the Kaizen tracks, may give them a try sometime, they looked real nice once assembled. Greg, I looked at modifying the Tamiya parts, and took a shot at removing the two caps by the intake, promptly slipped and gouged the deck, so I just went ahead and popped the whole thing out. I wasn't sure if a tank the Israelis probably got as a complete HVSS unit would have a modded engine cover, thought I'd be better off just doing the whole swap. I kind of like the way the IDF clocked the TC cupola, it eliminates the "blind spot" from the very front vision block caused by the gunner's sight.
Thanks, Jeff. I got a little more done Friday night, bits from the Velinden M50 turret kit, and some stuff under the rear overhang. Still plugging along.....
I wish I had built my M4A1E8 1/16 Sherman an IDF tank. I do think now's the time to make room for one on the bench just like yours!
Jeff
1/16th? Cool, very cool. Outer return rollers still off to permit removal of tracks for painting, but good catch. So, primer: And you heard it from the person it happened to, Sharpie ink will bleed through Tamiya primer. You can see it where I marked the turret top, in front of the loader's hatch, to get the smoke mortar location. Mr Surfacer to the rescue, and I found a few other little hickies, but it's now ready for color.
Jeff, this is, bar none, the fastest build I have done in years. Not sure why, but I normally take 3 to 5 months to get something this far. Maybe it's because it's a Sherman and I had all the bits on hand.
JUST out of curiosity... why 5 months or so? Is it a corrections list or modifications needed or this has just been a simple build without any need of many corrections?